
We are currently living/working at McMurdo Station, located at the end of the Hut Point Peninsula of Ross Island, which is the solid ground farthest south accessible by ship and the most southern place in the world to SCUBA dive!
Ross Island is located within the Ross Sea, and where we dive is within the McMurdo Sound. To the south of Ross Island (top/top-left of map below) you can see the permanent Ross Ice Shelf.

An ice shelf is basically a floating glacier that forms where an ice sheet flows down to a coastline and onto the ocean surface. An ice sheet is any mass of glacial land ice extending more than 50,000 square kilometers (20,000 square miles). The Antarctic ice sheet covers about 98% of the Antarctic continent and is the largest single mass of ice on Earth, with an average thickness of over 2 kilometers. The ice shelf and neighboring ice sheet (both composed of frozen freshwater) are permanent features in Antarctica and are present year-round.
Conversely, there is also transient seasonal sea ice here. Sea ice is frozen salt water that melts and refreezes every year in Antarctica.

The extent of sea ice in a given year varies according to climate variability and long-term climate change. Antarctic sea ice usually peaks in September (the end of Southern Hemisphere winter) and retreats to a minimum in February. Check out the satellite image below showing areas of the Ross Sea covered in sea ice taken in a previous year.

In a “normal” year – the size of the continent of Antarctica doubles due to sea ice growth… but not this year.
This past winter in Antarctica has been unseasonably warm. That, coupled with unfavorable storms blowing ice out of the McMurdo Sound, has resulted in the lowest recorded sea ice extent and thickness ever for this area. August 19th, 2022 (only 10 days before we arrived in Antarctica) was the first day of sea ice growth here. As this is the end of winter, the sea ice is usually well established by this point. This is not encouraging news for a team of SCUBA divers who rely on sea ice in order to dive!
So the start of this trip has been stressful. Every day we have been monitoring the weather and literally sitting, watching, and waiting for sea water to freeze. We need thick enough sea ice in order to drive vehicles out to our dive sites, drill a hole, and dive through. Without the sea ice, we can’t get to where we need to go.
Luckily, one of our dive sites is located very close to McMurdo Station, in an area where there has been sea ice for a while. But before we were allowed to work there, we had to complete the Sea Ice Safety Training course.
First, we learned about the various factors which affect the thickness of the ice.

Ice strength directly correlates to ice temperature, which is in turn affected by air temperature. Because of this, snow cover on top of the ice actually slows ice growth as it insulates the ice from the cold air temperature. High solar radiation decreases ice growth rate. In addition, if the albedo (amount of light reflected by the ice) is low then ice growth is also reduced. Ice close to the shore tends to get “dirty” due to dust and dirt which is blown onto it from the land. The dark-colored dirt causes the ice to absorb more solar radiation, reduces albedo, and consequently slows ice growth. Finally, depending on the direction of wind and ocean currents, ice growth can be impeded if the newly formed ice is constantly being swept away.
Next, we learned about the hazards associated with sea ice.

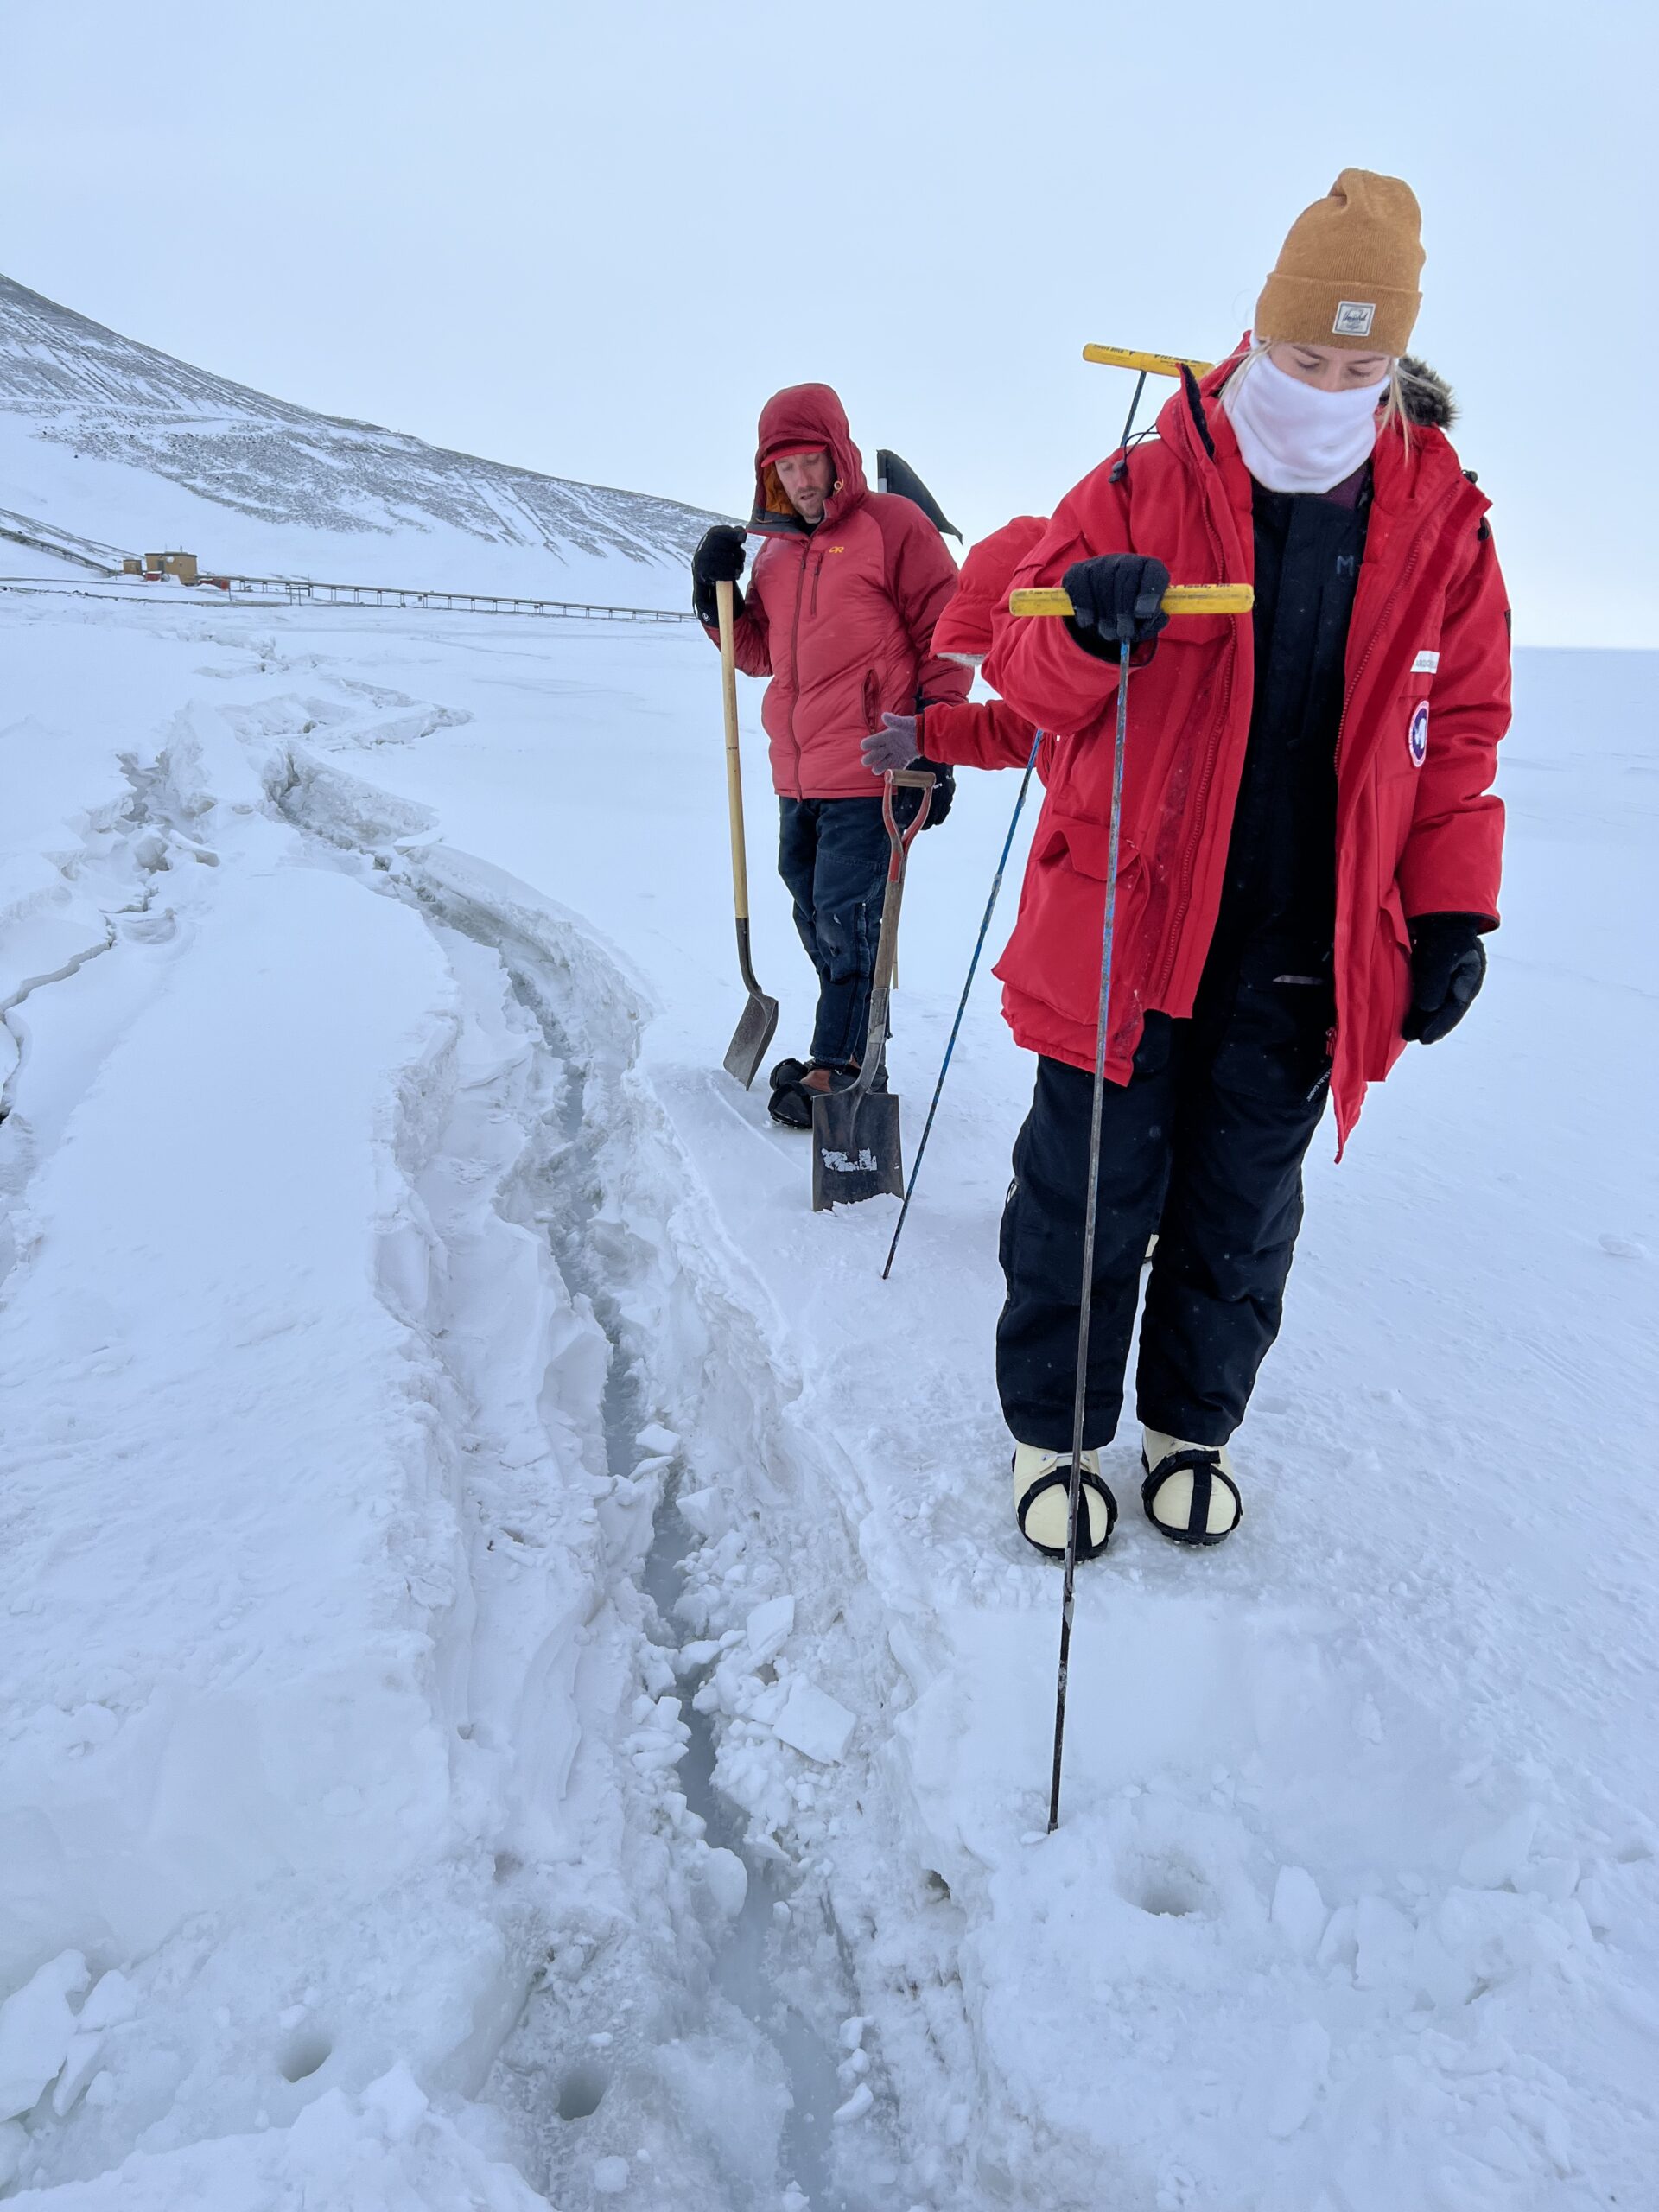
The main hazards which concern us are cracks in the sea ice, also known as “leads”. When driving across sea ice, first you need to spot a crack (which can be difficult if it is covered with snow), and then you need to profile it. The width and depth of the crack determine whether or not it is safe for your vehicle to travel over the crack safely without risk of falling through to the icy ocean below (which has happened before!)
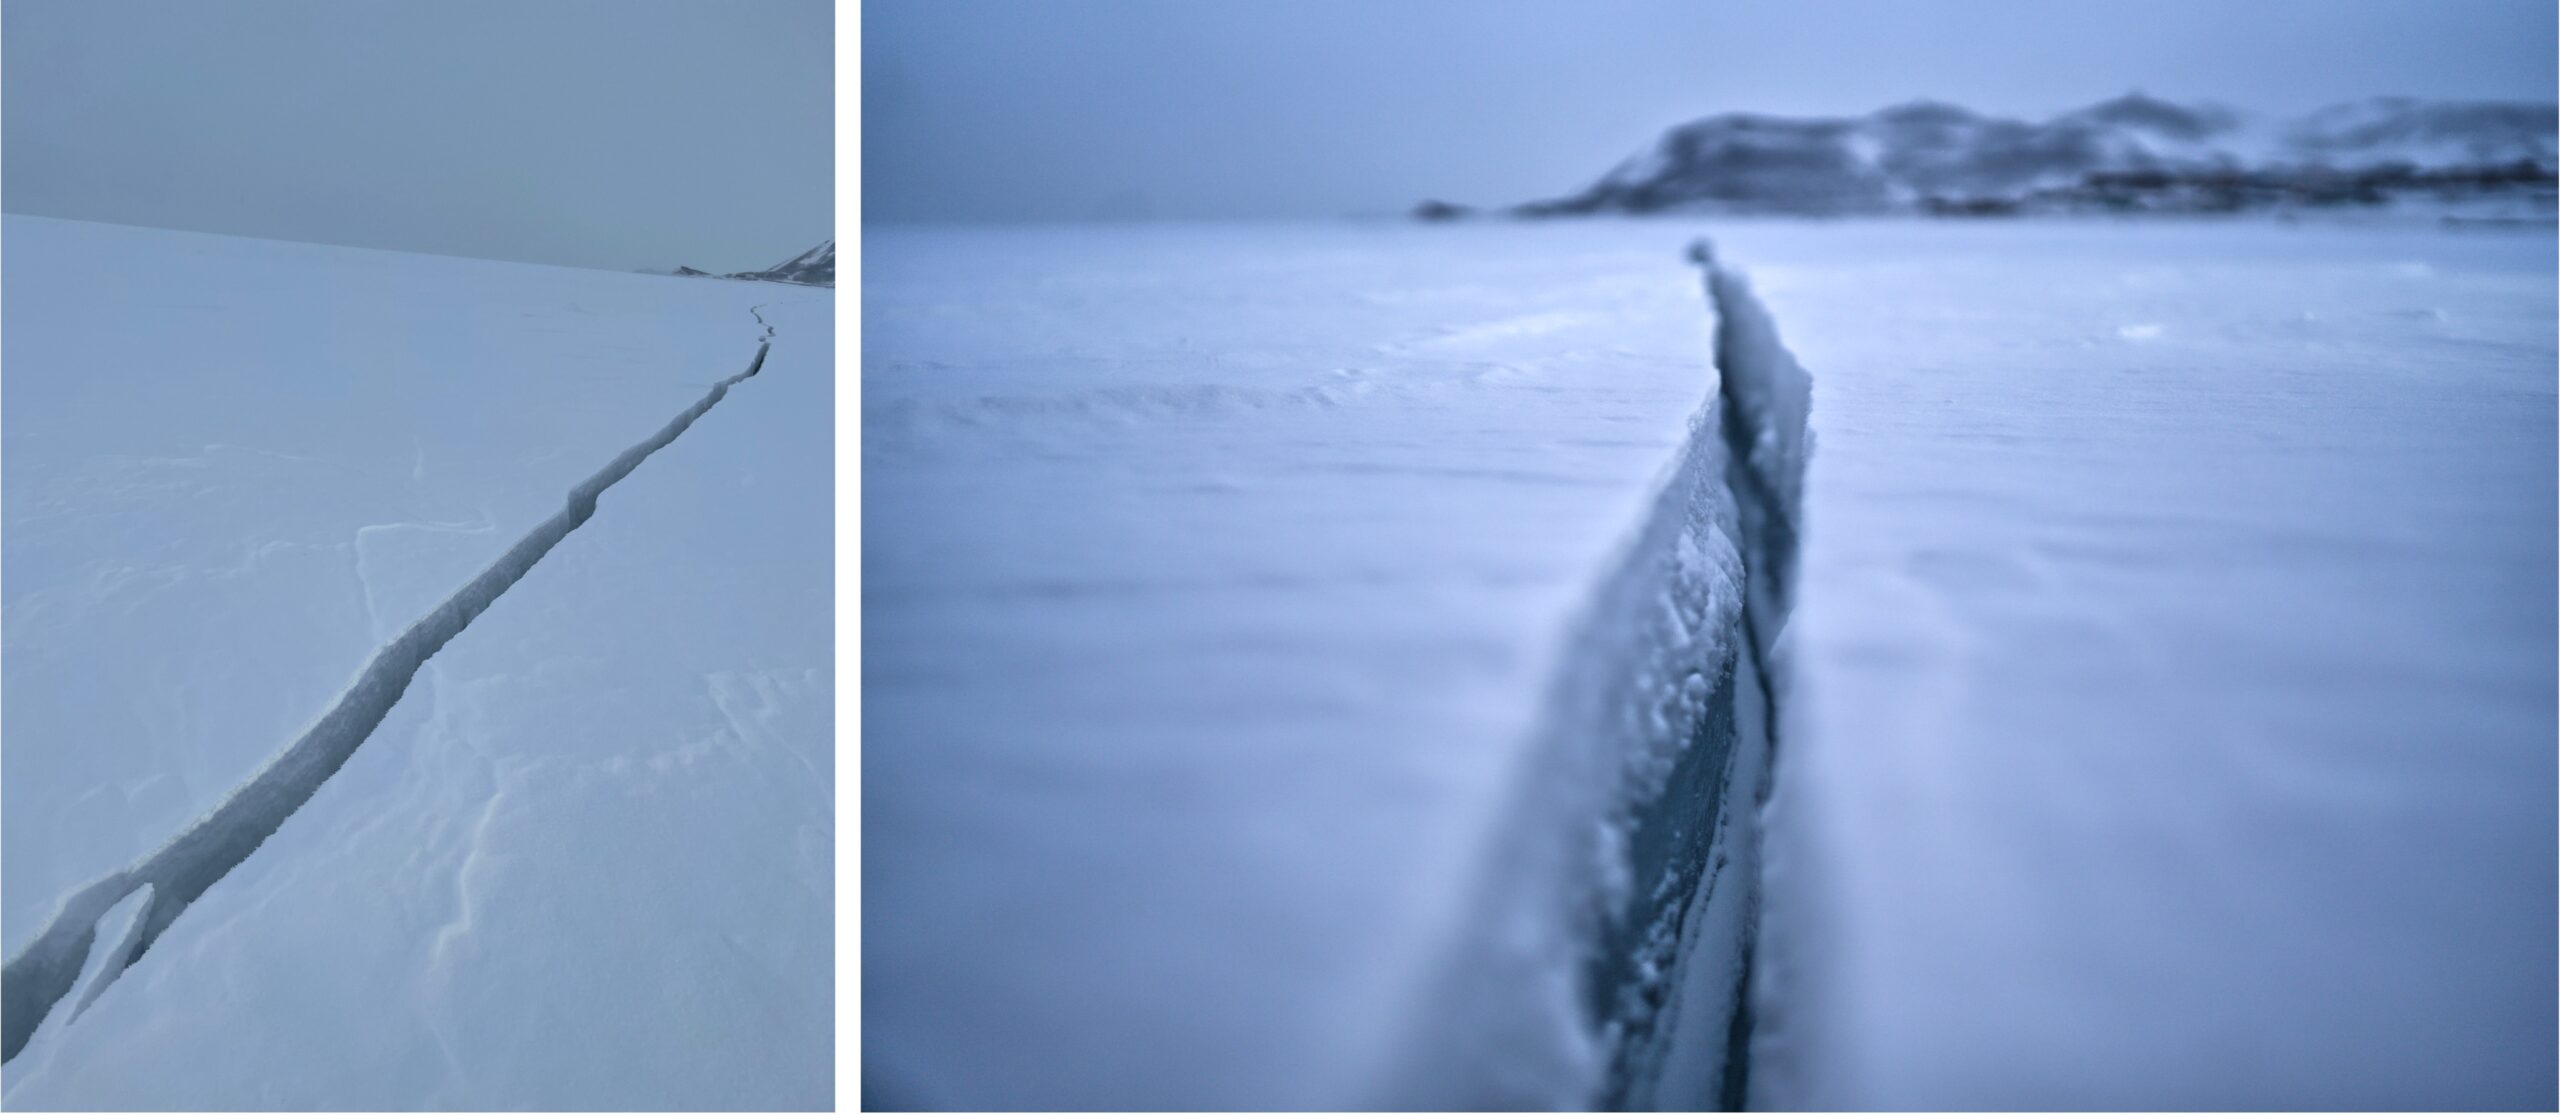
The next thing we were taught was that sea ice cracks are consistently unpredictable!

In the slide above are two pictures of the same sea ice crack, taken 6 days apart! Within 24 hours the crack increased in width by 20cm. Three days later the crack was giant (>1m wide), and then within a few days, the temperatures increased causing the ice to expand and thus the two sides of the sea ice slammed together to form what is known as a pressure ridge (Oct 5th photo). This is a great example of how dynamic and fluctuating the sea ice cracks can be.
There are three types of sea ice crack:

Our instructor jokingly referred to the straight edge cracks as “Bob Ross” cracks, as they are lovely and clean lines! Working cracks are constantly opening and closing. Tidal cracks form close to shore and are a result of ice freezing to land and cracking as the water-level moves with the tides.
When you come across a crack, there are several steps you must follow before driving across:

So now we know the theory about sea ice cracks and how to profile them. Time to get out there and have a look in person!
To get out onto the sea ice we traveled in a Hagglund – a tracked, all-terrain vehicle.


After about 10 minutes of driving we come across a nice Bob-Ross-looking straight-edge crack:
Next, we need to clear the snow away from on top of the crack so that we can see the ice below. It turns out the best way to stay warm in Antarctica is to grab a shovel!

Once we have cleared a strip perpendicular across the crack, it is time to start drilling.
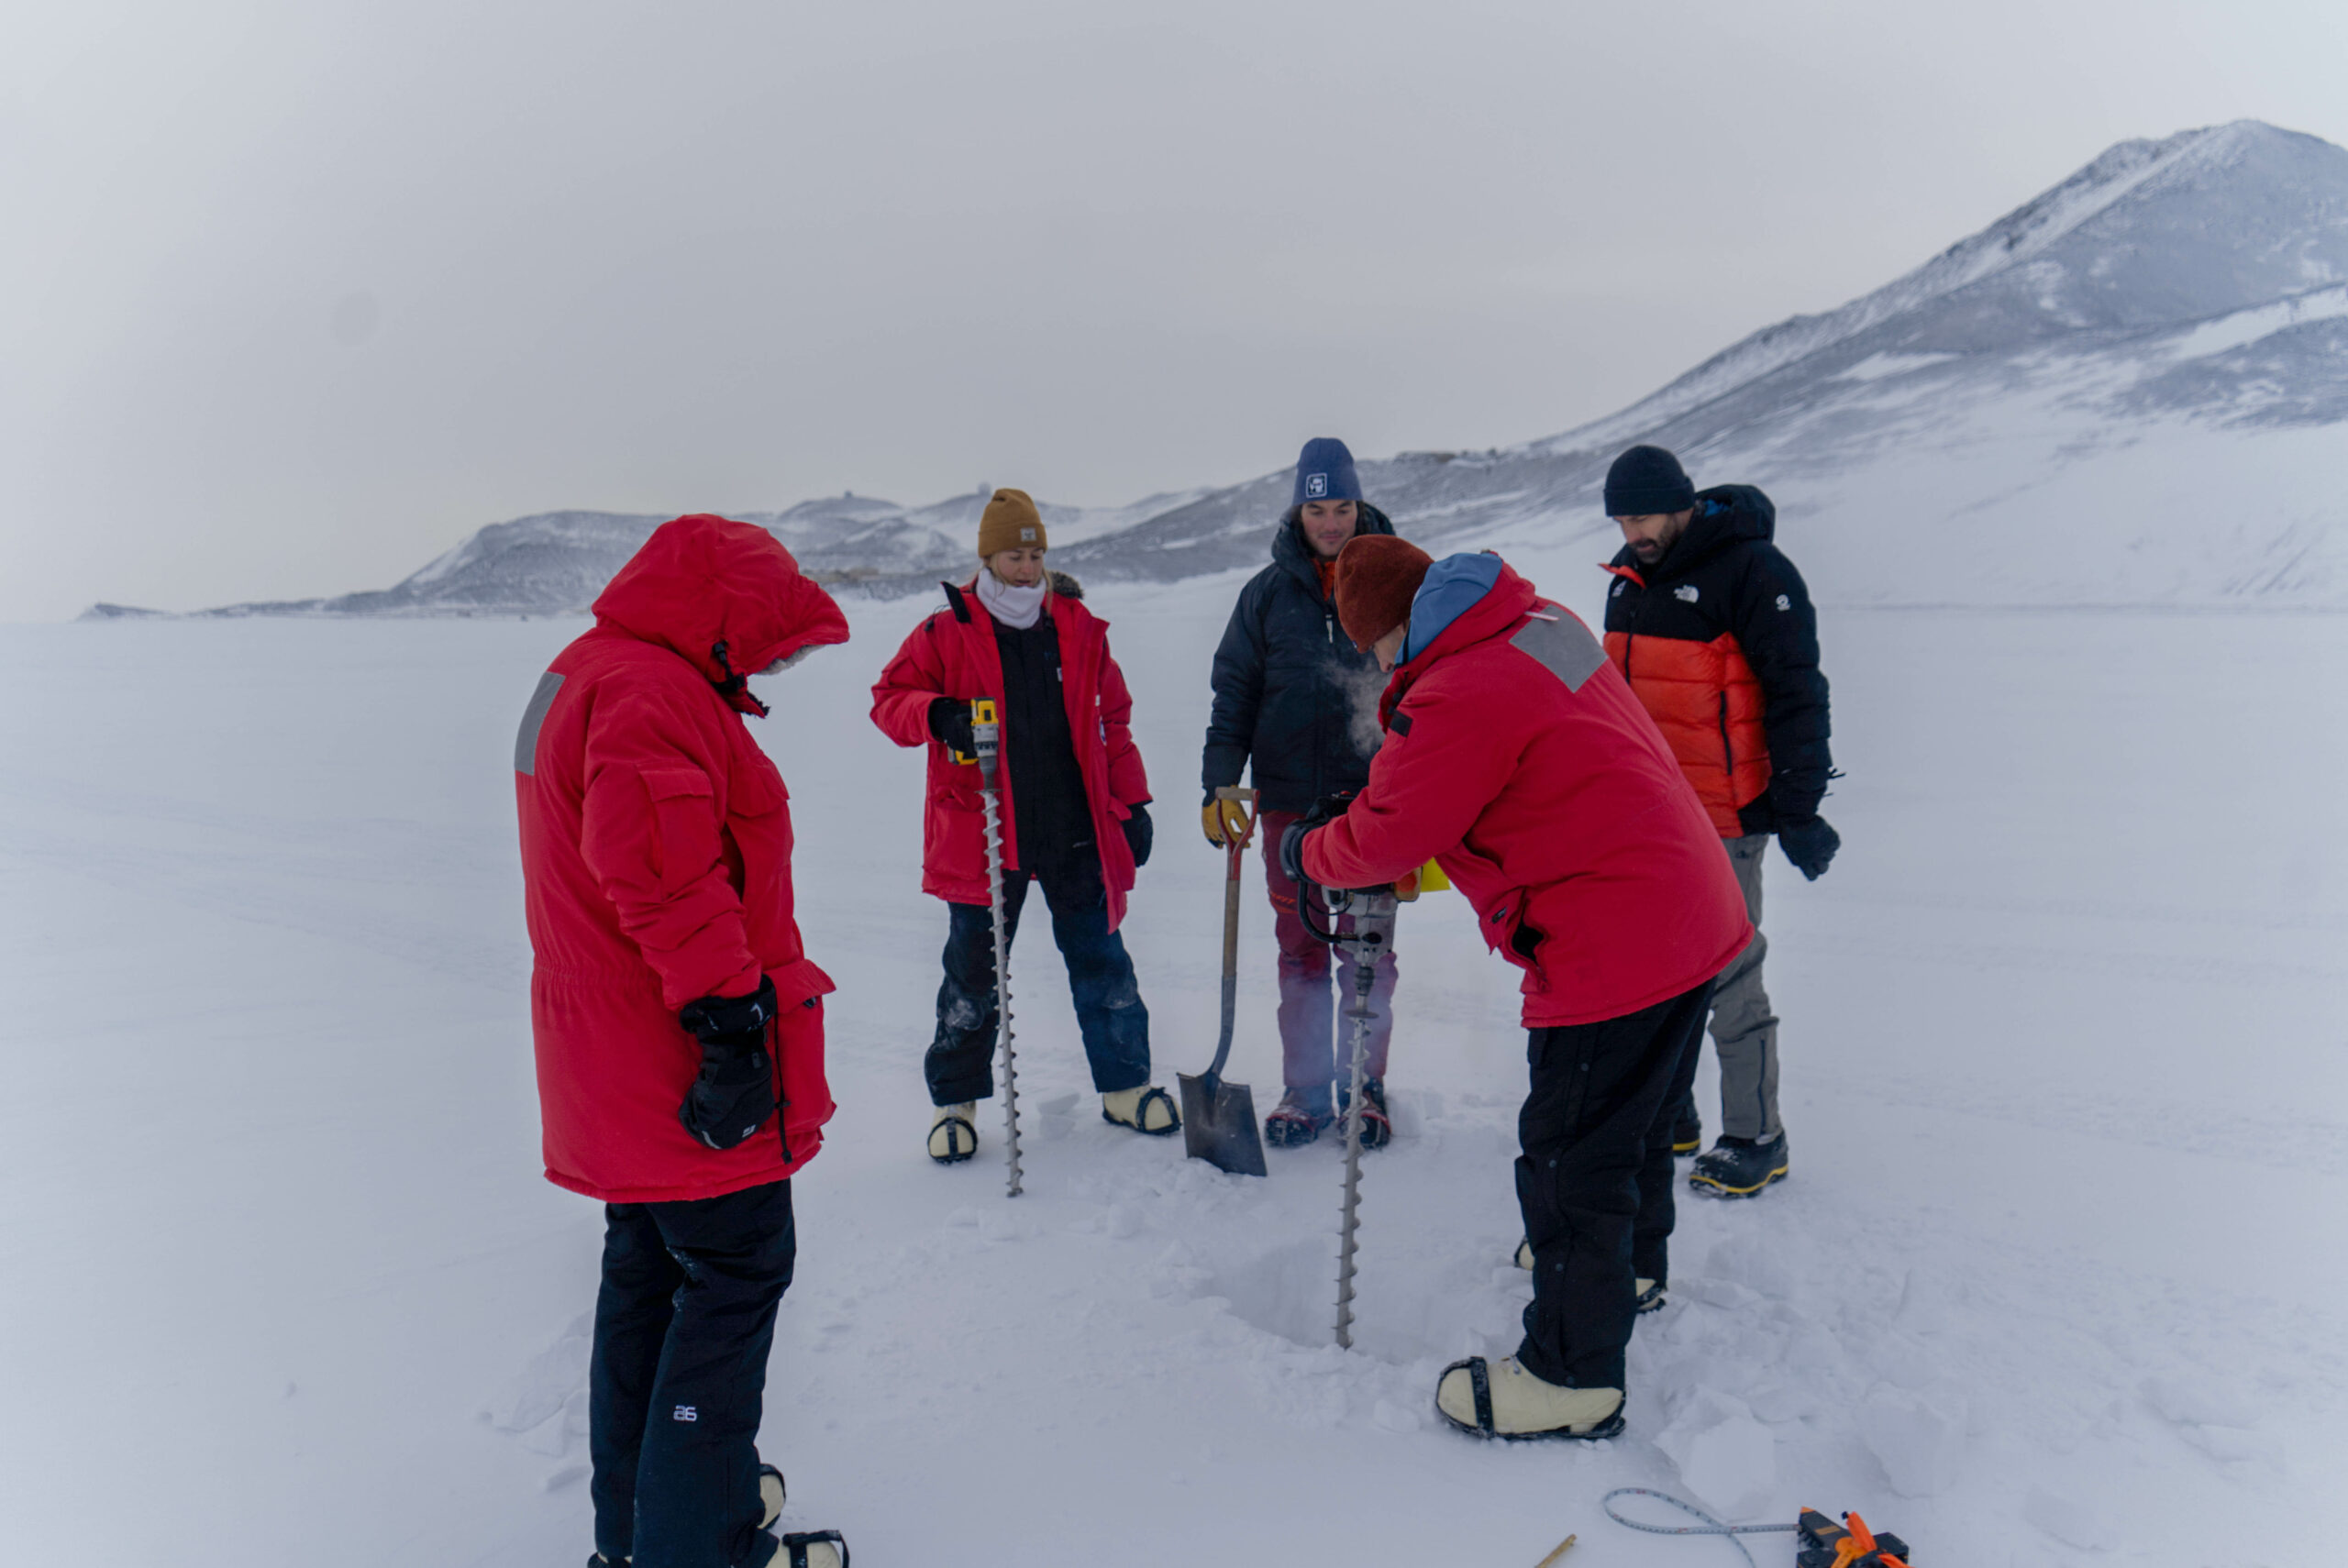
The aim is to drill at several locations on either side of the crack, measure the thickness of the ice, and then calculate the effective crack width. The maximum effective crack width of a given vehicle is equal to 1/3 of the length of the tracks.
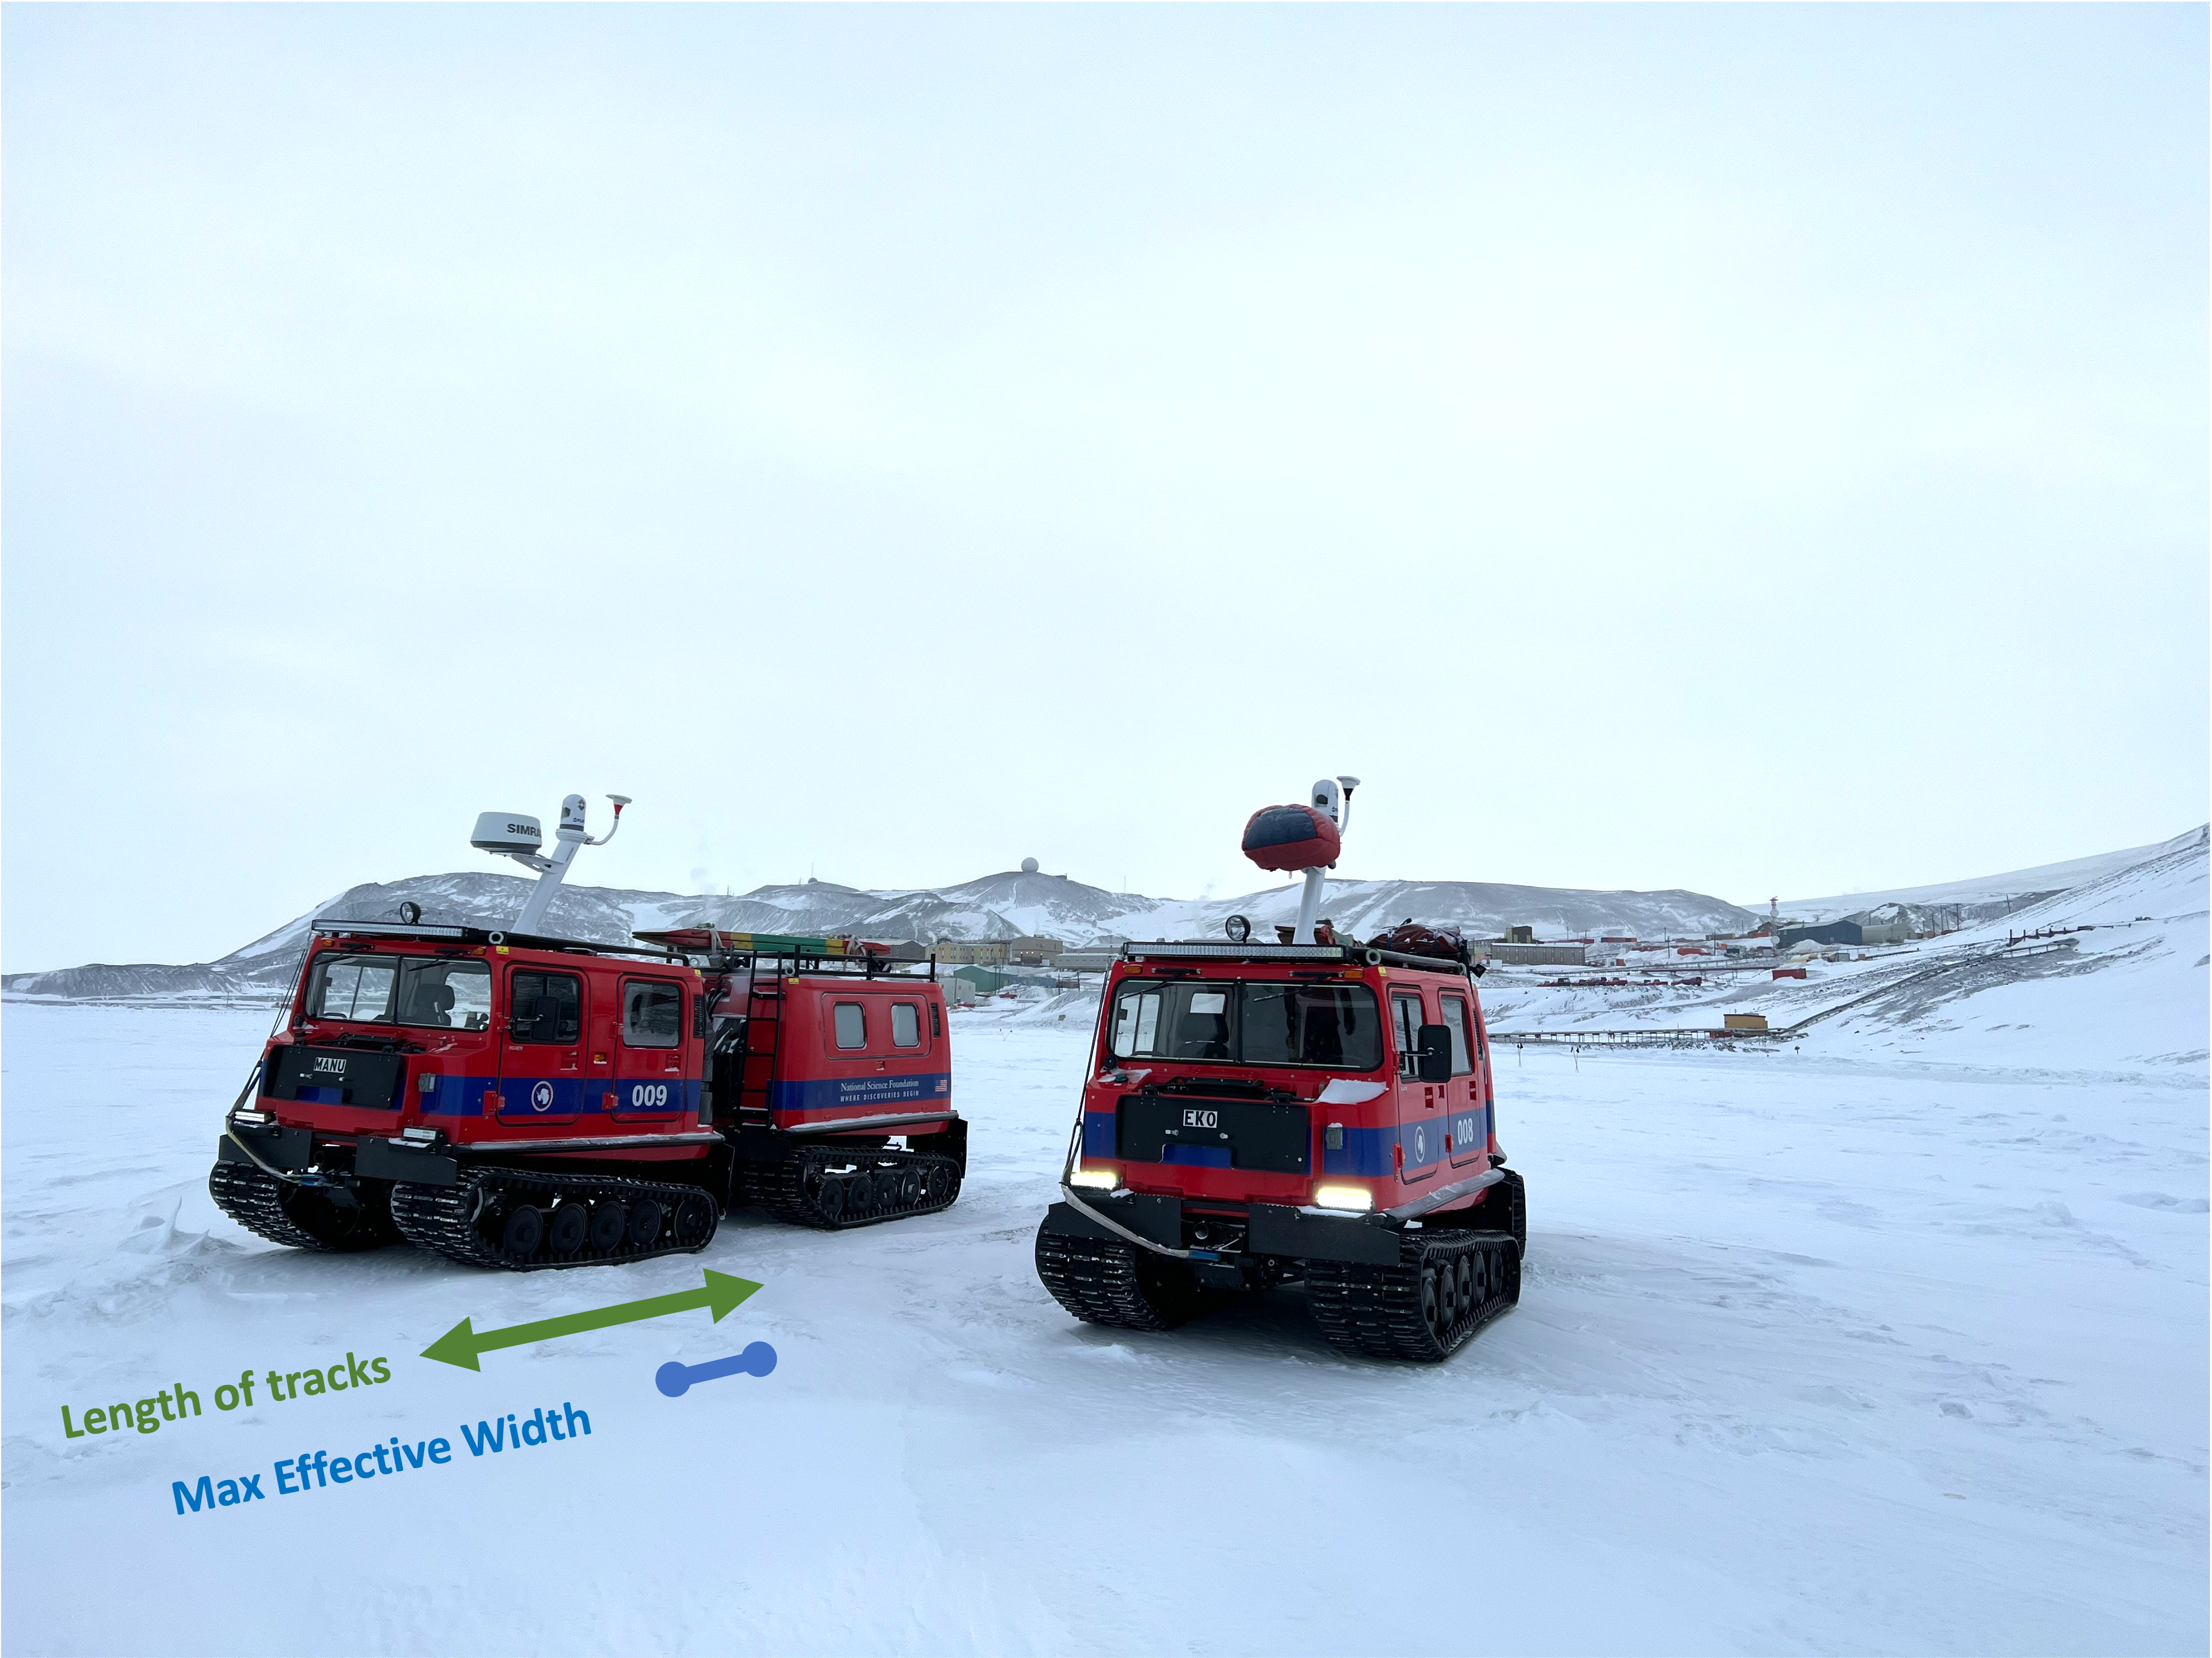
The Hagglund can cross any crack that is less than 70 cm wide, as long as the ice is at least 41 cm thick.
After the holes are drilled, it’s time to measure the thickness of the ice. For that, we use a tape measure with a linear weight at the end. The weight hangs perpendicular to the tape, so once you put it through the hole and lower it down below the ice, you can pull it upwards gently and it will catch on the underside of the sea ice.

This particular crack was in ice that was >2m thick, so it was definitely thick enough for us to drive across.
We then repeated the process with a wider, messier-looking working crack:
And that was it for the day! We were very excited to finally be trained and approved to get out onto the sea ice by ourselves. Thanks to FS&T (Field Support and Training) for showing us the ropes – or the drills as the case may be.
