I have three leggy locals to introduce you to today:
Dr Amy Moran finds a crinoid!
1) Crinoid Promachocrinus kerguelensis
This crinoid is found throughout Antarctica from 10 to 2100 meters depth! It has 20 arms, each of which is edged with feathery pinnules which contain sensory and reproductive organs. Promachocrinus uses its arms to trap drifting plankton. The arms have grooves down the middle along which trapped food particles travel towards the upwards-facing mouth. It changes its feeding posture/shape depending on the ocean currents to maximize the amount of food it captures! Underneath the arms, it has legs (cirri) which it uses to walk along the seafloor and cling to objects.
2) Scale worm Eulagisca gigantea
This might be the coolest animal I found this year! I was just blown away with how big this animal was! This GIANT worm has been observed in Antarctica at depths between 30 to 920 meters. It grows up to 22 cm long and 10cm wide! The eversible proboscis mouthpart bears a pair of extra large jaws and is about a quarter of the length of the whole worm! Translation: I wouldn’t want to pick a fight with this critter!
3) Sea Spider Colossendeis megalonyx
Found throughout Antarctica at depths from 3 to 4900 m. They are often 20 to 30 cm in diameter! They feed on soft corals, small hydroids, sponges, and pelagic invertebrates, including the gastropod Clione antarctica, jellyfish, and ctenophores. Later in the dive, I found another one feeding on something gelatinous (as shown in the photo below). The giant Antarctic sea spiders might be my favourite animal here!
This species of sea star lives throughout Antarctica at depths up to 915 meters! It grows to be about 7cm in diameter and takes ~9 years to reach the population average weight of 30g. It is estimated to live for up to 100 years! This sea star is near the top of the food chain in the Antarctic seafloor ecosystems and is a voracious predator akin to the lions of the Serengeti! It eats many things including, but not limited to detritus, small crustaceans, other sea star species, scallops, bryozoans, sponges, sea urchins, and worms.
2. Acondontaster conspicuous
This species of sea star lives throughout Antarctica at depths up to 760 meters! It grows to be about 14cm in diameter. This species eats many species of sponges. They often aggregate and gang up on a single sponge, eventually killing it. The previous red species of sea star (Odontaster validus) gang up to feed on the Acodontaster species (as shown below in Norbert Wu’s photo), and by doing so keep the population in check. Otherwise, this yellow species would get out of control and decimate the sponge populations.
3. Diplasterias brucei
The yellow sea star Diplasterias bruceii lives throughout Antarctica at depths up to 752m and grows to be about 24 cm in diameter. This is a specialized predator of molluscs including bivalves and gastropods.
Also in the image above:
The featherduster worm (AKA: a sabellid polychaete worm) belongs to the genus Perkinsiana. It is found throughout Antarctica at depths ranging from 3 to 800m. It grows up to 20 cm long. It possesses a crown of feeding appendages (radioles) and uses these to filter seawater for food. They can be tricky to photograph because if you get too close or spook them, they retract their radioles down inside their protective tube which is made of calcium carbonate.
The proboscis worm Parborlasia corrugatus lives throughout Antarctica at depths up to 3590m and grows to lengths of one to two meters, a diameter of two centimeters, and weighs up to 100g! Parborlasia corrugatus is a scavenger and a predator with a voracious appetite, and will eat almost anything; its diet includes sponges, jellyfish, diatoms, seastars, anemones, polychaete worms, molluscs, crustaceans, and fish. It can detect food at a distance with an efficient chemotactic sense. It has a large mouth and can consume prey almost as large as itself! Finally, they produce a lot of slime
In order to SCUBA dive under the sea ice of Antarctica, one must first create an entrance into, and (more importantly) an exit from, the frozen Southern Ocean.
On October 20th, 2023, we drilled an ice hole at the Cinder Cones dive site, located ~45 minutes away from McMurdo towards the Erebus Volcano.
At 9 am the dive team met the drill operator, the carpenters, and the sea ice field safety team at the ice pier. The drill operator towed the Terex drill, dive hut, and drill bit out to the site using a bulldozer. The carpenters (who de-winterize the huts) drove a pisten bully and towed the fuel for the gas heater. The field safety team drove a Haglund and were responsible for navigating a safe route for us across the ice cracks. Finally, the divers joined the caravan in two pisten bullys.
As we made our way (slowly) toward the desired dive site, we had to stop often when we saw signs of cracks in the ice. Every crack must be profiled: drilled on either side using a Kovacs drill and the thickness of the ice and the width of the gap measured with a weighted measuring tape. We then do a quick calculation to determine which, if any, of our vehicles can cross safely. Over the decades, a few vehicles have fallen through the sea ice near McMurdo, including the tractor “Big John”!
Here is a video outlining all the activities from the day, including our caravan across the sea ice, profiling cracks, navigating a safe path to Cinder Cones, attaching the drill bit to the Terex drill, drilling our hole, and dragging our dive hut into place so that we have a nice warm area to kit up for diving.
A short blog with a little more info about our arrival in Antarctica two weeks ago.
The plane landed safely on the ice! When the crew opened the rear hatch, we were immediately hit with a wave of icy cold air. Exiting the C17 aircraft is always really exciting as everyone is eager to get their first ever (or first of this season) glimpse of the icy continent. Once we disembark, we are quickly ushered along towards the transport vehicles that will be driving us to McMurdo Town.
Here is a compilation of some videos I took during this journey:
During a dive at Cinder Cones last week, Amy and I got to watch an incredible battle between two male Weddell seals underwater.
I was originally just filming Amy framed with a beautiful crack in the sea ice behind her, but then, out of the shadows, two giant seals started making a bee-line for her!
Luckily the camera was still rolling and therefore I caught the scuffle on camera! Check it out:
Weddell seals (Leptonychotes weddellii) live farther south than any other mammal. They grow between 2.5 and 3.5 meters long, and adults can weigh between 400-600 kg. They persist on a diet of fish, crustaceans, krill, squid, prawns, cephalopods, penguins, and even other seals!
Weddell Seals can stay underwater for up to 80 minutes at a time and have been documented to dive over 600 meters deep. These long dives are for both foraging and for finding new breathing holes in the ice above.
On our journey across the Southern Ocean, we flew directly over the Drygalski Ice Tongue!
An ice tongue forms when a glacier that is confined by a valley moves very rapidly out into a lake or (in this case) ocean, relative to other ice along the coastline. The ice tongue is actually a part of a glacier that is floating on the ocean.
When an ice tongue surges past adjacent coastal ice, the boundary experiences physical forces described as “shearing”. Look for the sheared, zig-zag edge of the Drygalski ice tongue in the timelapse video below.
Here are some amazing facts about the Drygalski Ice Tongue:
It is the largest ice tongue in the world!
It reaches 70 kilometers (43 miles) out to sea from the David Glacier
It ranges from 14 to 24 kilometers (9 to 15 miles) wide
It is thought to be at least 4,000 years old
The David Glacier grounding line, where the ice leaves the shore and begins to float, is in a depth of ~1,900 m (6,200 ft)
In 2016 a 30 km (19 mi) long section of the ice shelf calved to form two large icebergs
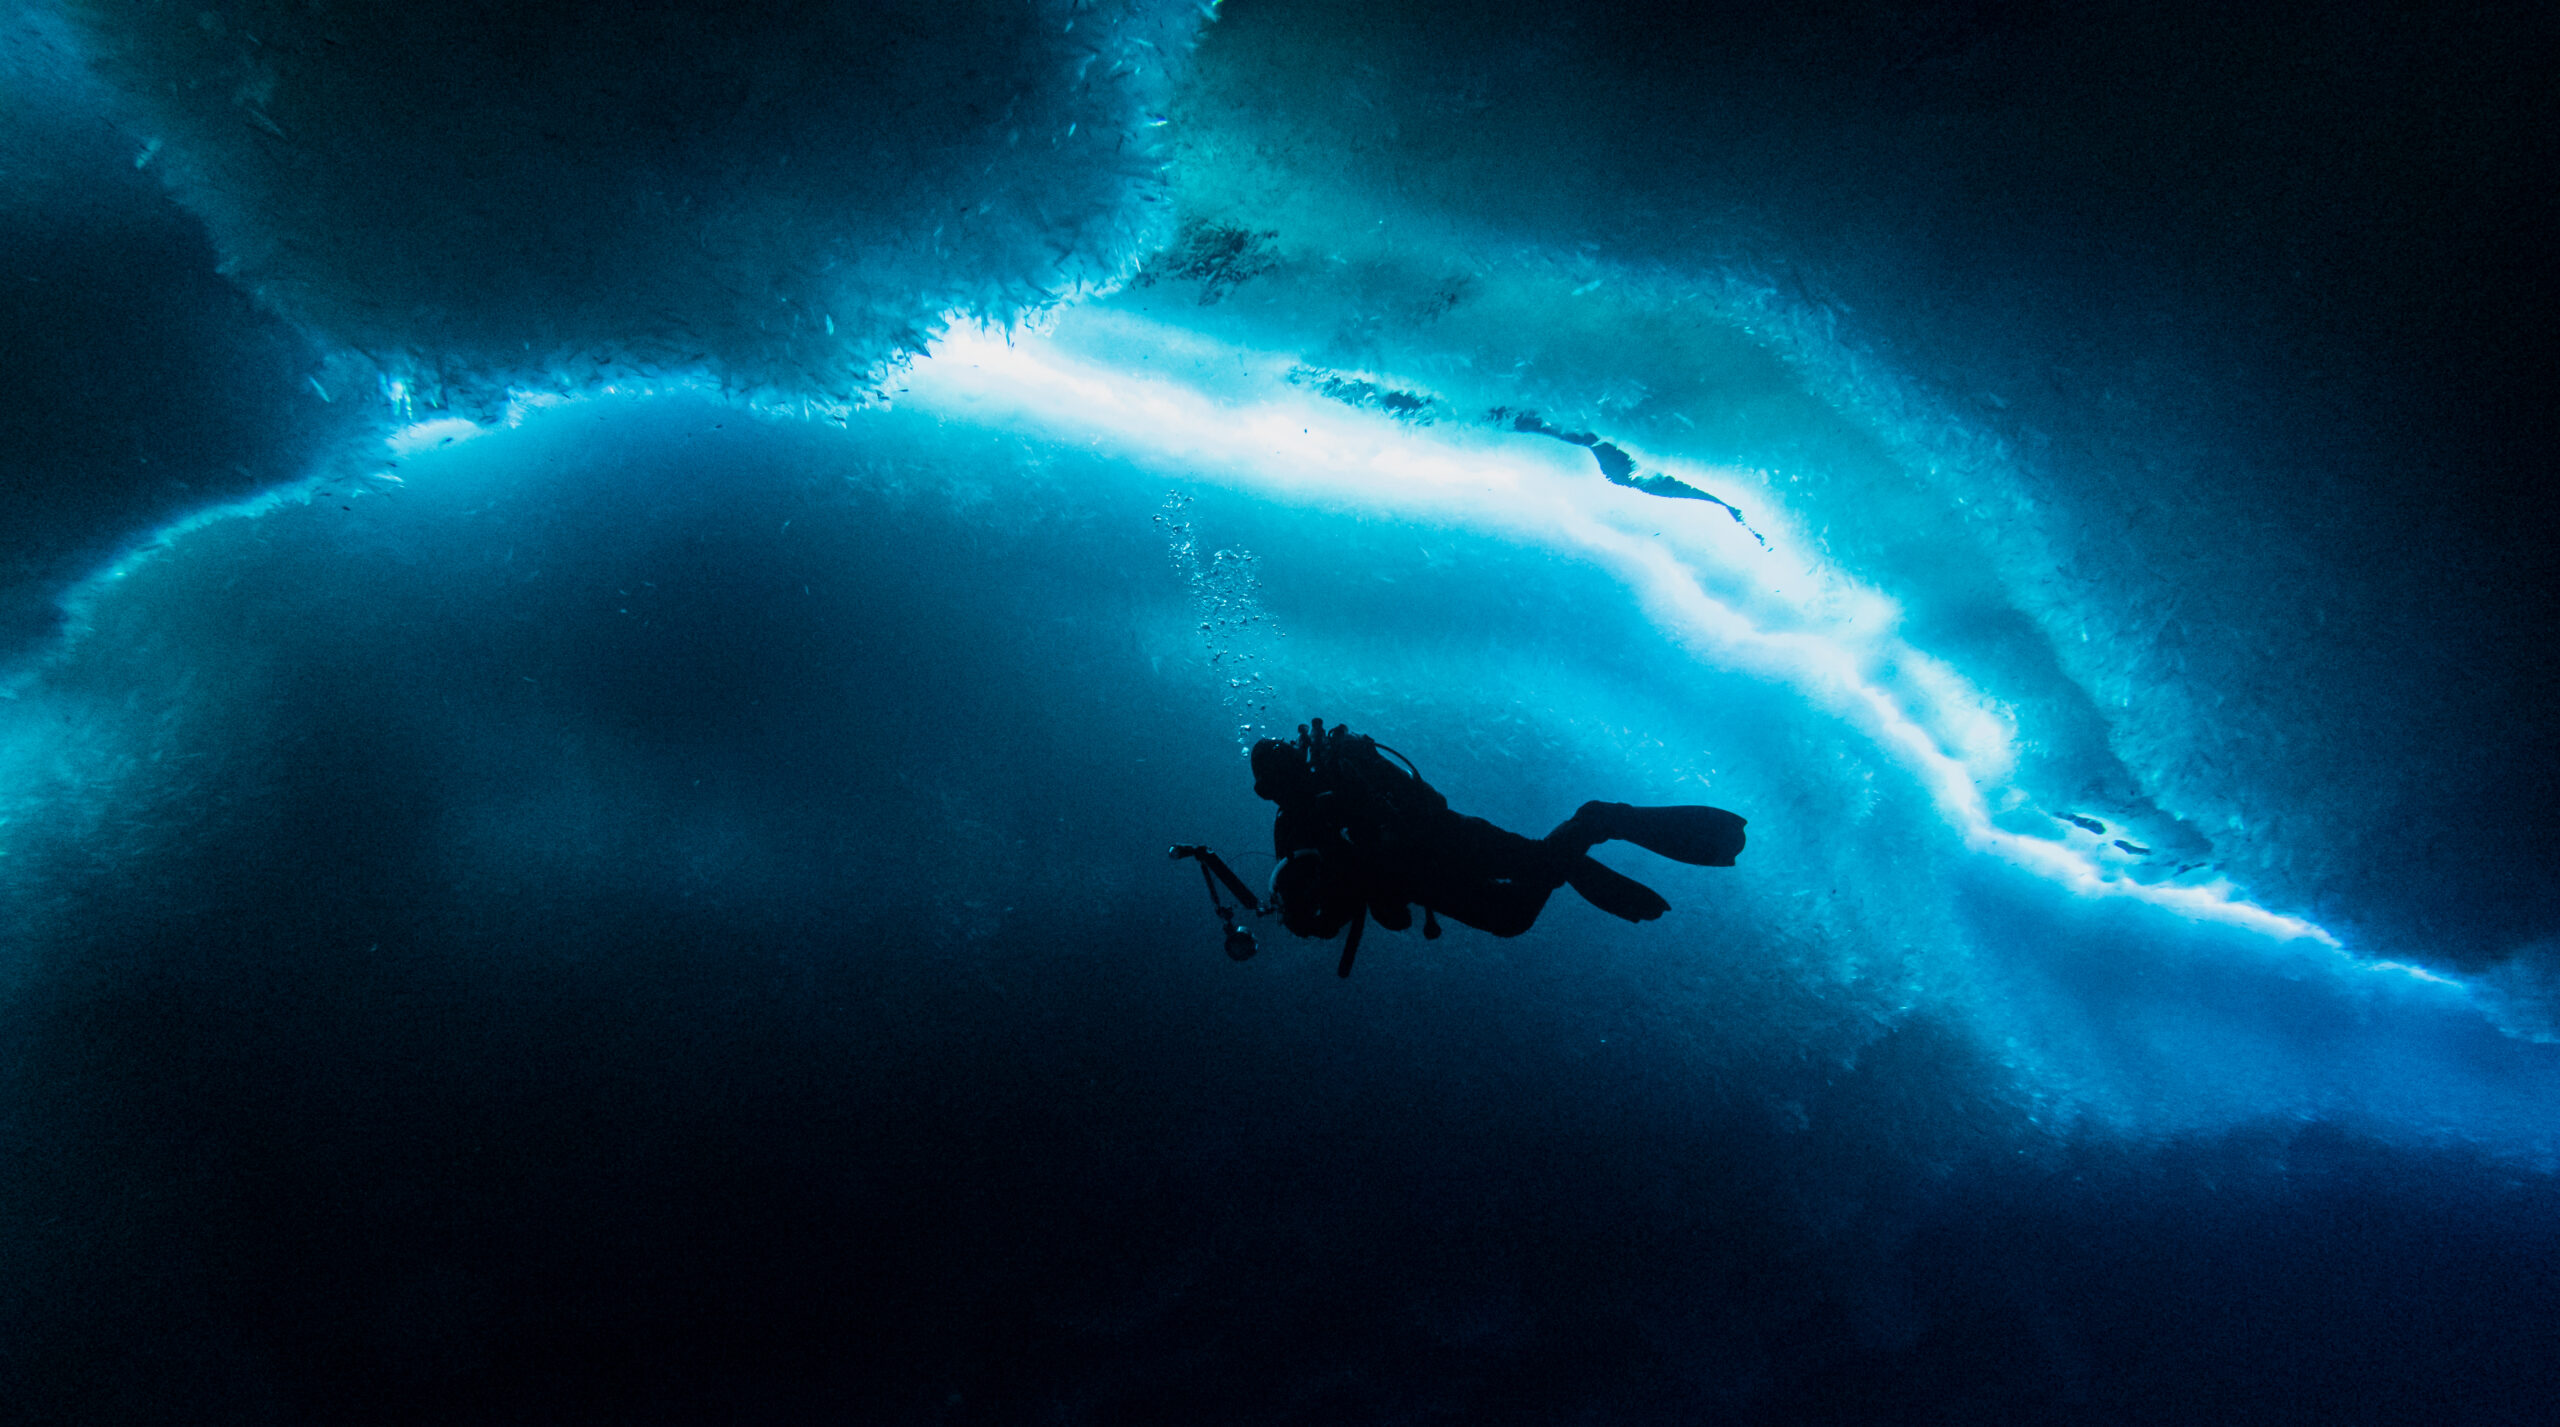
Diving under the ice in Antarctica is an almost indescribable experience. Words and photos do not do justice to the beauty of the lighting down there. On this dive, Andrew and I collected bryozoans for a pilot study on trophic carbon pathways. After collecting a few larger colonies, we explored the north side of the jetty dive site. Here are some of the photos from the dive:
Despite having visited this site several times this trip, it felt like I was seeing it for the first time. Just a wee shift in perspective gave me a wonderful new outlook. I suppose that applies to many things in life… I don’t think I will ever tire of taking photos here.
Getting things done in Antarctica isn’t easy. Even the most basic tasks require a bit of planning and preparation. Nothing is exempt. Life just isn’t simple or easy here at the bottom of the earth. SCUBA diving is no exception. The process of an actual dive down here is a story in itself. In an attempt to stay focused, I’m going to dive (ha!) into what it took for our team of four divers to get ready for this incredible adventure and those that helped us along the way.
5 Months before any of us would set foot on the ice a partial assembly of our team did what would be our first official training dive. The roaring winter seas on the southern coast of Oregon can sometimes be remarkably forgiving. This time around proved to be a confusing contrast of beautiful skies and unfortunate wind direction, making for a very brief splash in the water. Though it didn’t prove to be an opportunity to work out any processes underwater, it did kick off the beginning of a wonderful team bonding experience. Getting to know the team, what they’re most excited about, most concerned about, all helped us start to connect as people and build the trust that is so essential to the challenging trip we had on the horizon.
With a few fragmented trips in between, the whole team came together again for a weekend of diving, testing camera equipment and continuing to bond. We planned to bring an ambitious array of camera gear down to the ice. This ranged from GoPros, fixed lens compact cameras, a large full frame Canon and various lights and strobes. There’s no way to make yourself feel like an amateur again than by jumping into the water with a camera system you’ve never used before. Despite all the challenges, we did end up with a handful of acceptable shots throughout the trip. Beyond camera gear, we started to troubleshoot the actual dive equipment (actually quite important!) required for under ice diving. This involved tracking down leaks, replacing seals and zippers, fitting dry gloves and in lots of cases just ordering new gear. The challenge arose when we faced the reality that the dive industry was in no way exempt from the global supply chain issues everyone faced this past year.
In comes Eugene Skin Divers Supply. This place is somewhere in between a hardware and toy story with everything you could dream of to assemble a kit worthy of diving under the ice at the bottom of the planet. And if they didn’t have it on the shelf, they figured out how to get it as fast as possible. The owners Mike and Diana (along with their entire team) became critical to our success and embraced our trip with a commitment as if it was their own. Out of stock parts were miraculously found, zippers replaced, holes sealed. It’s safe to say there’s a 0% chance we’d have shown up on the ice prepared and on time if it wasn’t for the shop going above and beyond.
A long list of requirements had to be met before we could even get on a plane. The equipment was one hurdle but all aspects of our certifications and recertifications fell into the lap of our steadfast Dive Safety Officer at OSU, Kevin Buch. Over the last year Kevin tirelessly helped us work through the dive proficiency requirements necessary to be a USAP (United States Antarctic Program) diver. Ultimately Kevin wanted us to head town to the ice feeling confident and qualified and to have a safe and successful trip. Over the last year Kevin held CPR, O2, and First Aid classes for us, arranged practice dives and was in constant contact with us to make sure we were on track.
The list extends on and on to those who helped us each personally as we prepared for this adventure. We’re all incredibly grateful for our family and friends that patiently waited as we were occupied diving many weekends, pushing off social obligations to complete paperwork, and were maybe otherwise not always entirely present as our minds drifted often towards the adventure to the ice that awaited us.
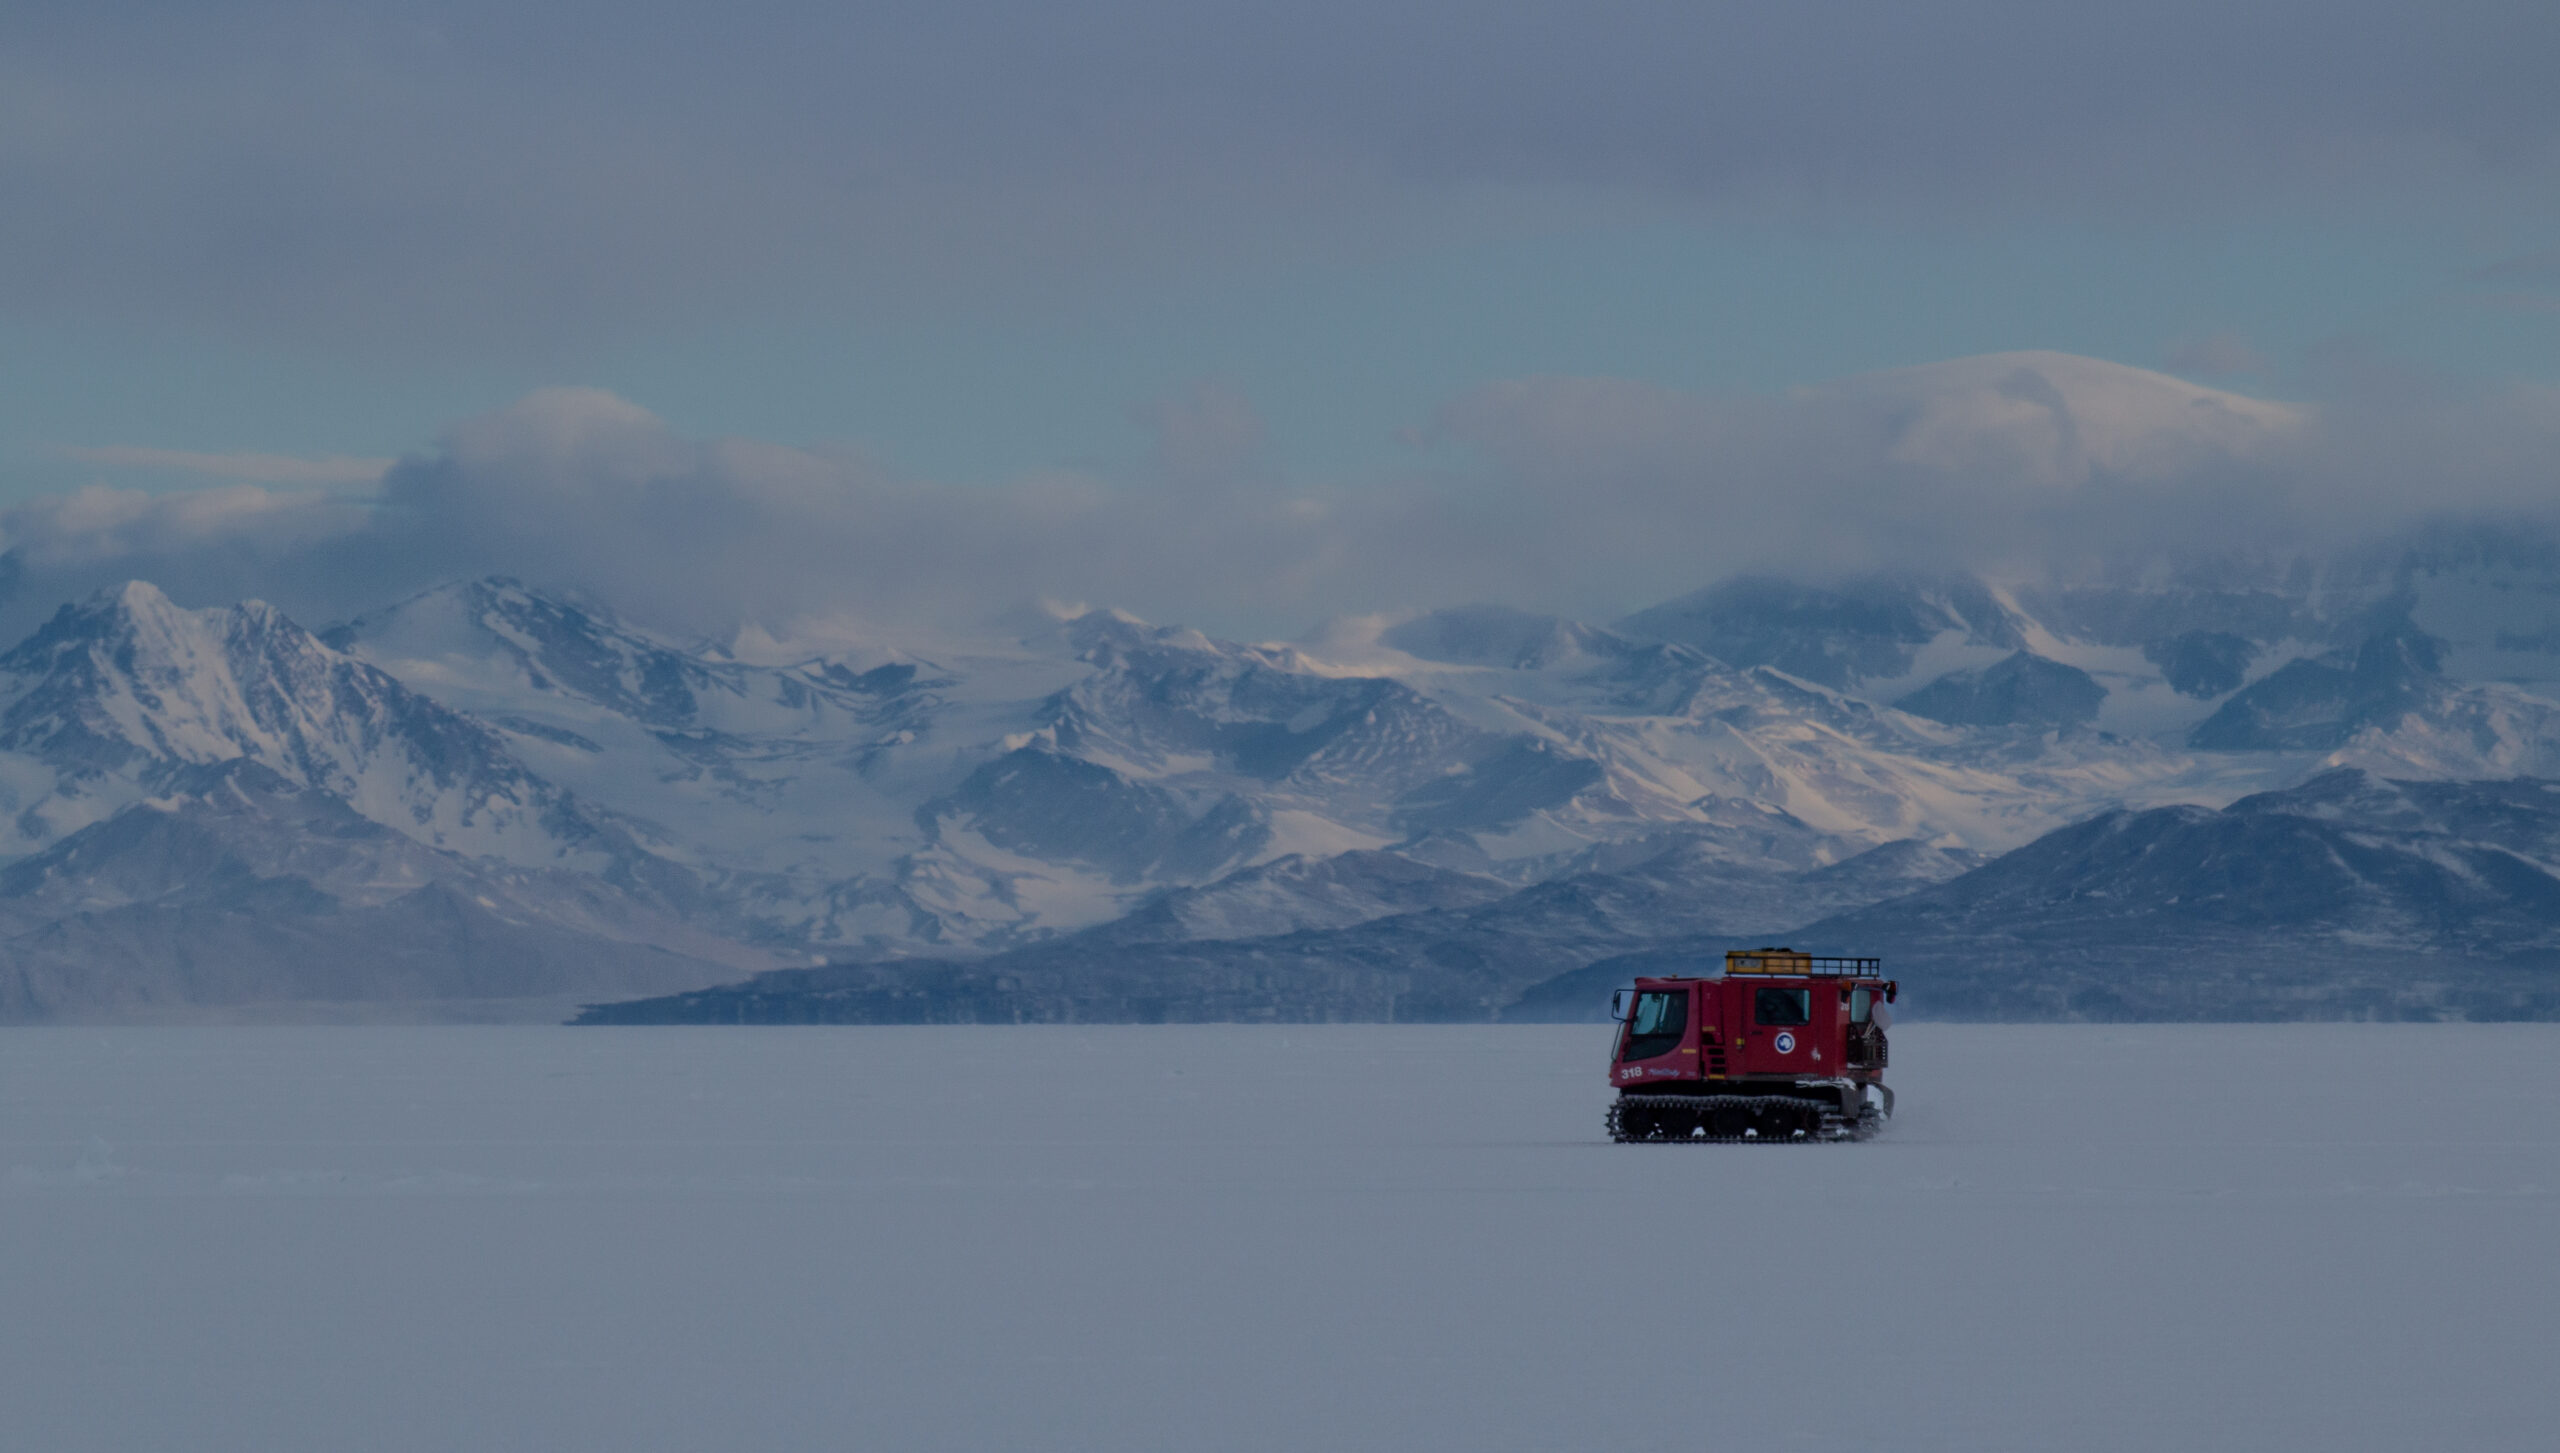
For the past week or two, we have been SCUBA diving at two new sites called Cinder Cones and Turtle Rock. Access to both sites involves a 1-to-1.5-hour drive in the Pistin Bully on the sea ice towards Erebus Bay.
Video credit: Rowan McLachlan
This drive is arguably the most beautiful commute on the planet.
Photo credit: Rowan McLachlan
This journey, whilst beautiful, is not always the most comfortable! The sea ice is covered in cracks, rafted ice, and pressure ridges, all of which are quite bumpy to cross. Unfortunately, only the driver’s seat has any suspension… luckily, we all take turns driving!
Last Friday, on our journey home after a day of diving under the ice, we received an unexpected call on the radio from Central Comms at McMurdo Station:
“Pistin Bully 318. This is Central Comms on Channel 3. Over.”
“Central Comms. This is Pistin Bully 318. Go ahead.”
“Pistin Bully 318. We wanted to let you know that there are penguins on the sea ice about a mile ahead of you on the road”
“Thank you central comms!”
This is the first penguin sighting this year at McMurdo and everyone was very excited – including those working at Central Comms!
As we continued our drive, I asked Rob, who I was driving with that day whether he thought they would be Adelie or Emperor penguins – and he reckoned Emperors that had wandered over from Cape Crozier.
Cape Crozier is the most easterly point of Ross Island, as shown in the map below (FYI McMurdo Towan where we are currently located next to Hut Point on the peninsula at the bottom left of the map). Cape Crozier is home to one of the two southernmost emperor penguin colonies in the world (>1900 breeding pairs as of 2018), one of the largest Adelie penguin colonies in the world (~270,000 breeding pairs as of 2012), and one of the largest south polar skua colonies in the world (~1,000 breeding pairs) [according to Wikipedia!].
As we approached, I quickly grabbed my camera and set it up with my 200 mm zoom lens. I was very excited to get to see wild penguins! As we drew closer to town, we were scanning the horizon frantically. It turned out that they were impossible to miss! Up ahead, at the side of the flagged sea ice route were two little black-and-white mounds.
As part of the Antarctic treaty, all wildlife in Antarctica is protected and it is against the law to engage in harmful interference in Antarctica of native mammals, native birds, native plants or native invertebrates. So we kept our distance and parked the Pistin Bully about 100 m away. In my frantic attempt to take photos, I jumped out of the vehicle without grabbing my Big Red jacket or gloves – both of which were really necessary today as the wind had picked up. However, at that time, I couldn’t feel the cold – I was too excited! I ran away from the Pistin Bully and away from the others to get a shot of the penguins with McMurdo Town in the background:
Photo credit: Rowan McLachlan
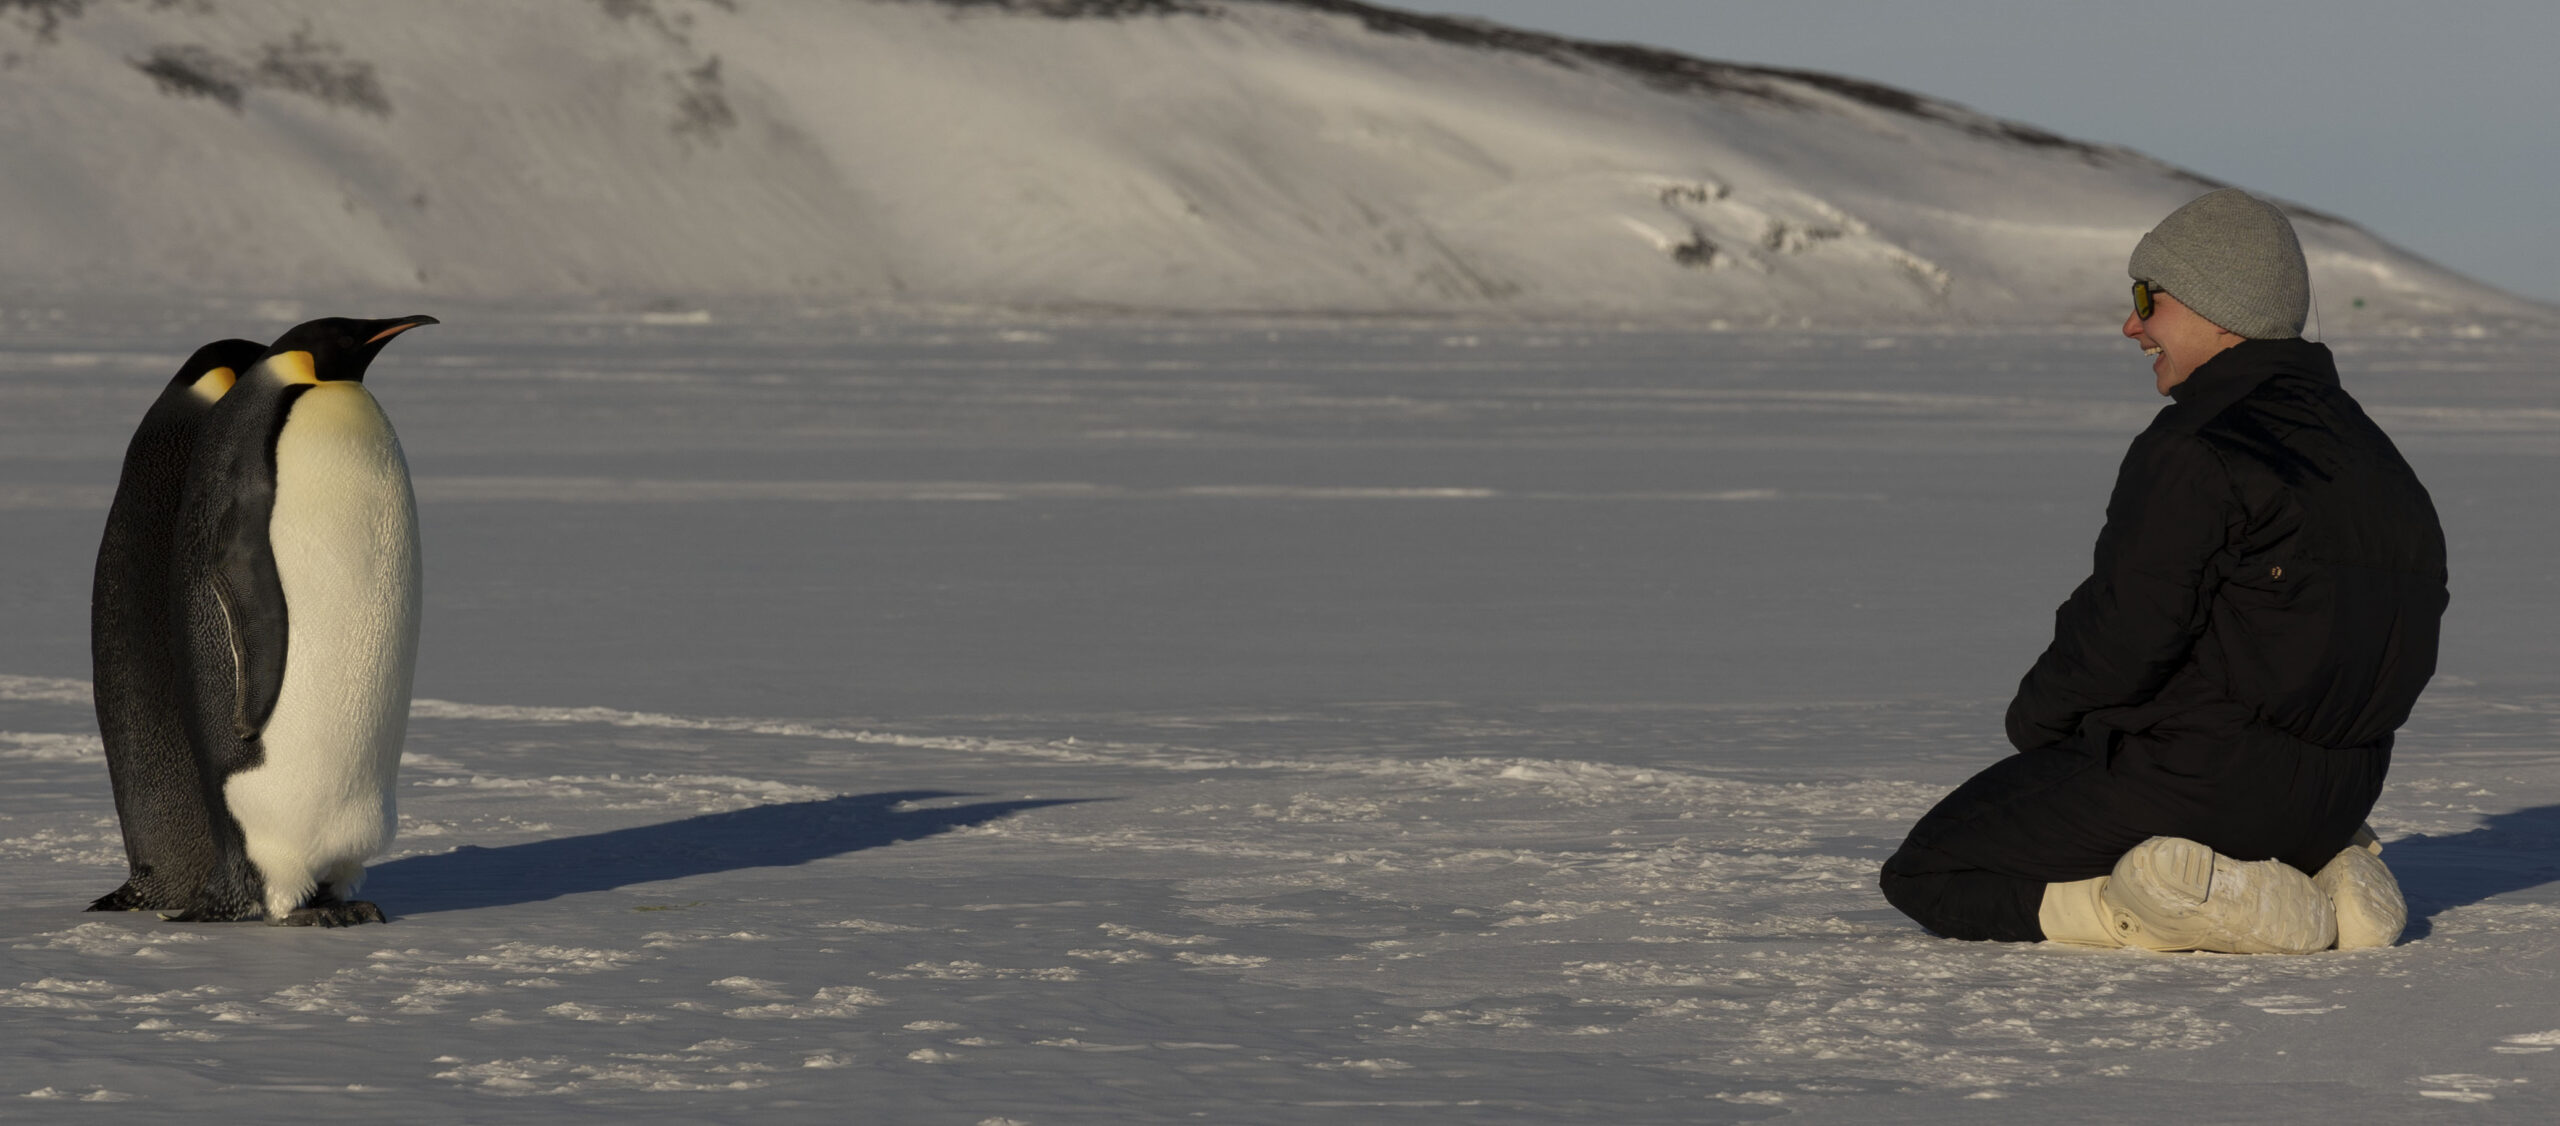
However, as soon as I knelt on the ground, the penguins looked in my direction, and started to walk directly toward me!
The way they walked was adorable. The slow and steady waddle! The closer and closer they got, the more zoomed-in my photos were becoming. Suddenly wishing I had opted for a different camera lens! Eventually, it reached the point where I could barely fit their heads in the frame! I had no idea they were going to be this curious!
Photo credit: Rowan McLachlan
When they were about 6 ft away from me, they halted their march and surveyed me thoroughly. Watchful eyes, wing flaps, and head bobs. They were unbelievably beautiful. The yellow colors on their neck and the pink on their beaks were gorgeous. Their feathers were so intricate and shiny. Not to mention, they were adorably fat and super cute!
I was on cloud nine. Finally, I just put the camera down and enjoyed the moment.
Photo credit: Andrew Thurber
Here I was, at the bottom of the world having this incredible interaction with some of the locals. As one of the scientists who are working on the sea ice, we were incredibly fortunate to have this experience – the majority of McMurdo Citizens are not able to get this close to wildlife – and so I realize what a privilege this was. However, some folks were able to watch us from the station with their binoculars!
Eventually, I couldn’t feel my fingers anymore and my face was getting very cold from the wind. So I headed back to the Pistin Bully, backing away slowly so as not to startle them. However, they were not phased. In fact not long after I left, they started their little waddle and came right on up to the Pistin Bully to have a look.
We spent about 30 minutes watching the penguins. They were very serene and a pleasure to observe.
Video credit: Rowan McLachlan
This was definitely one of the highlights of my trip. Thank you to my new feathery friends.
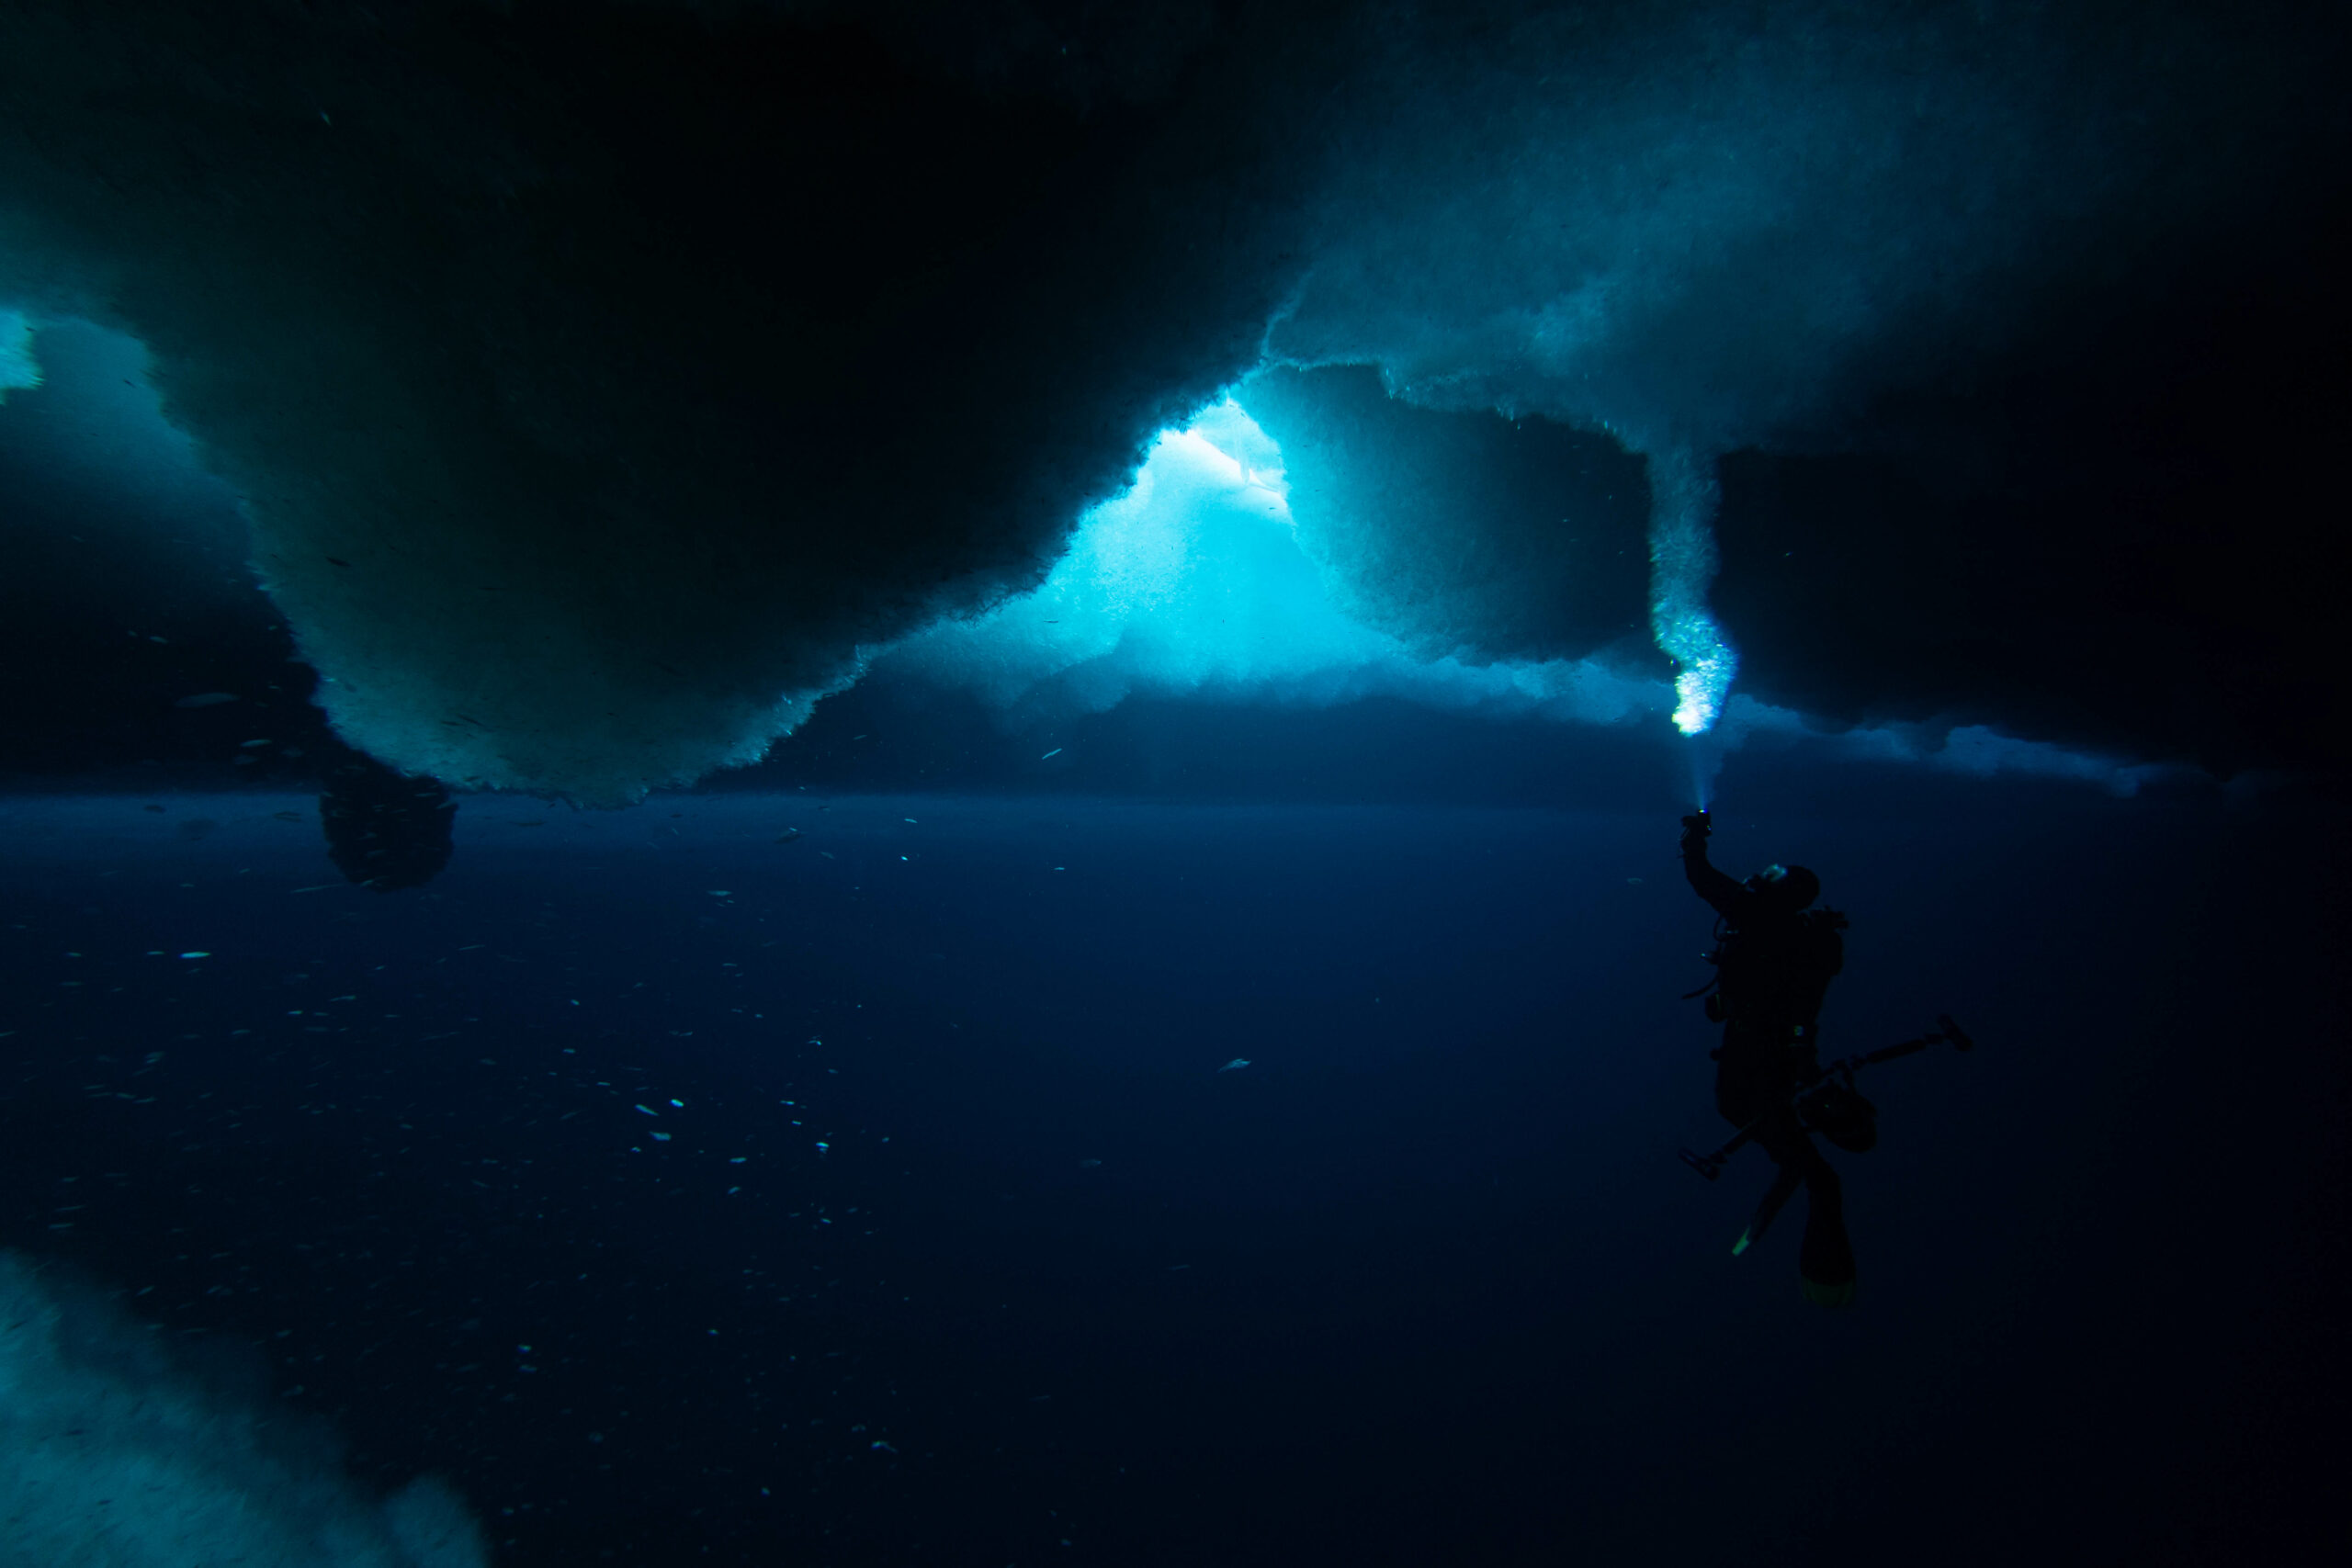
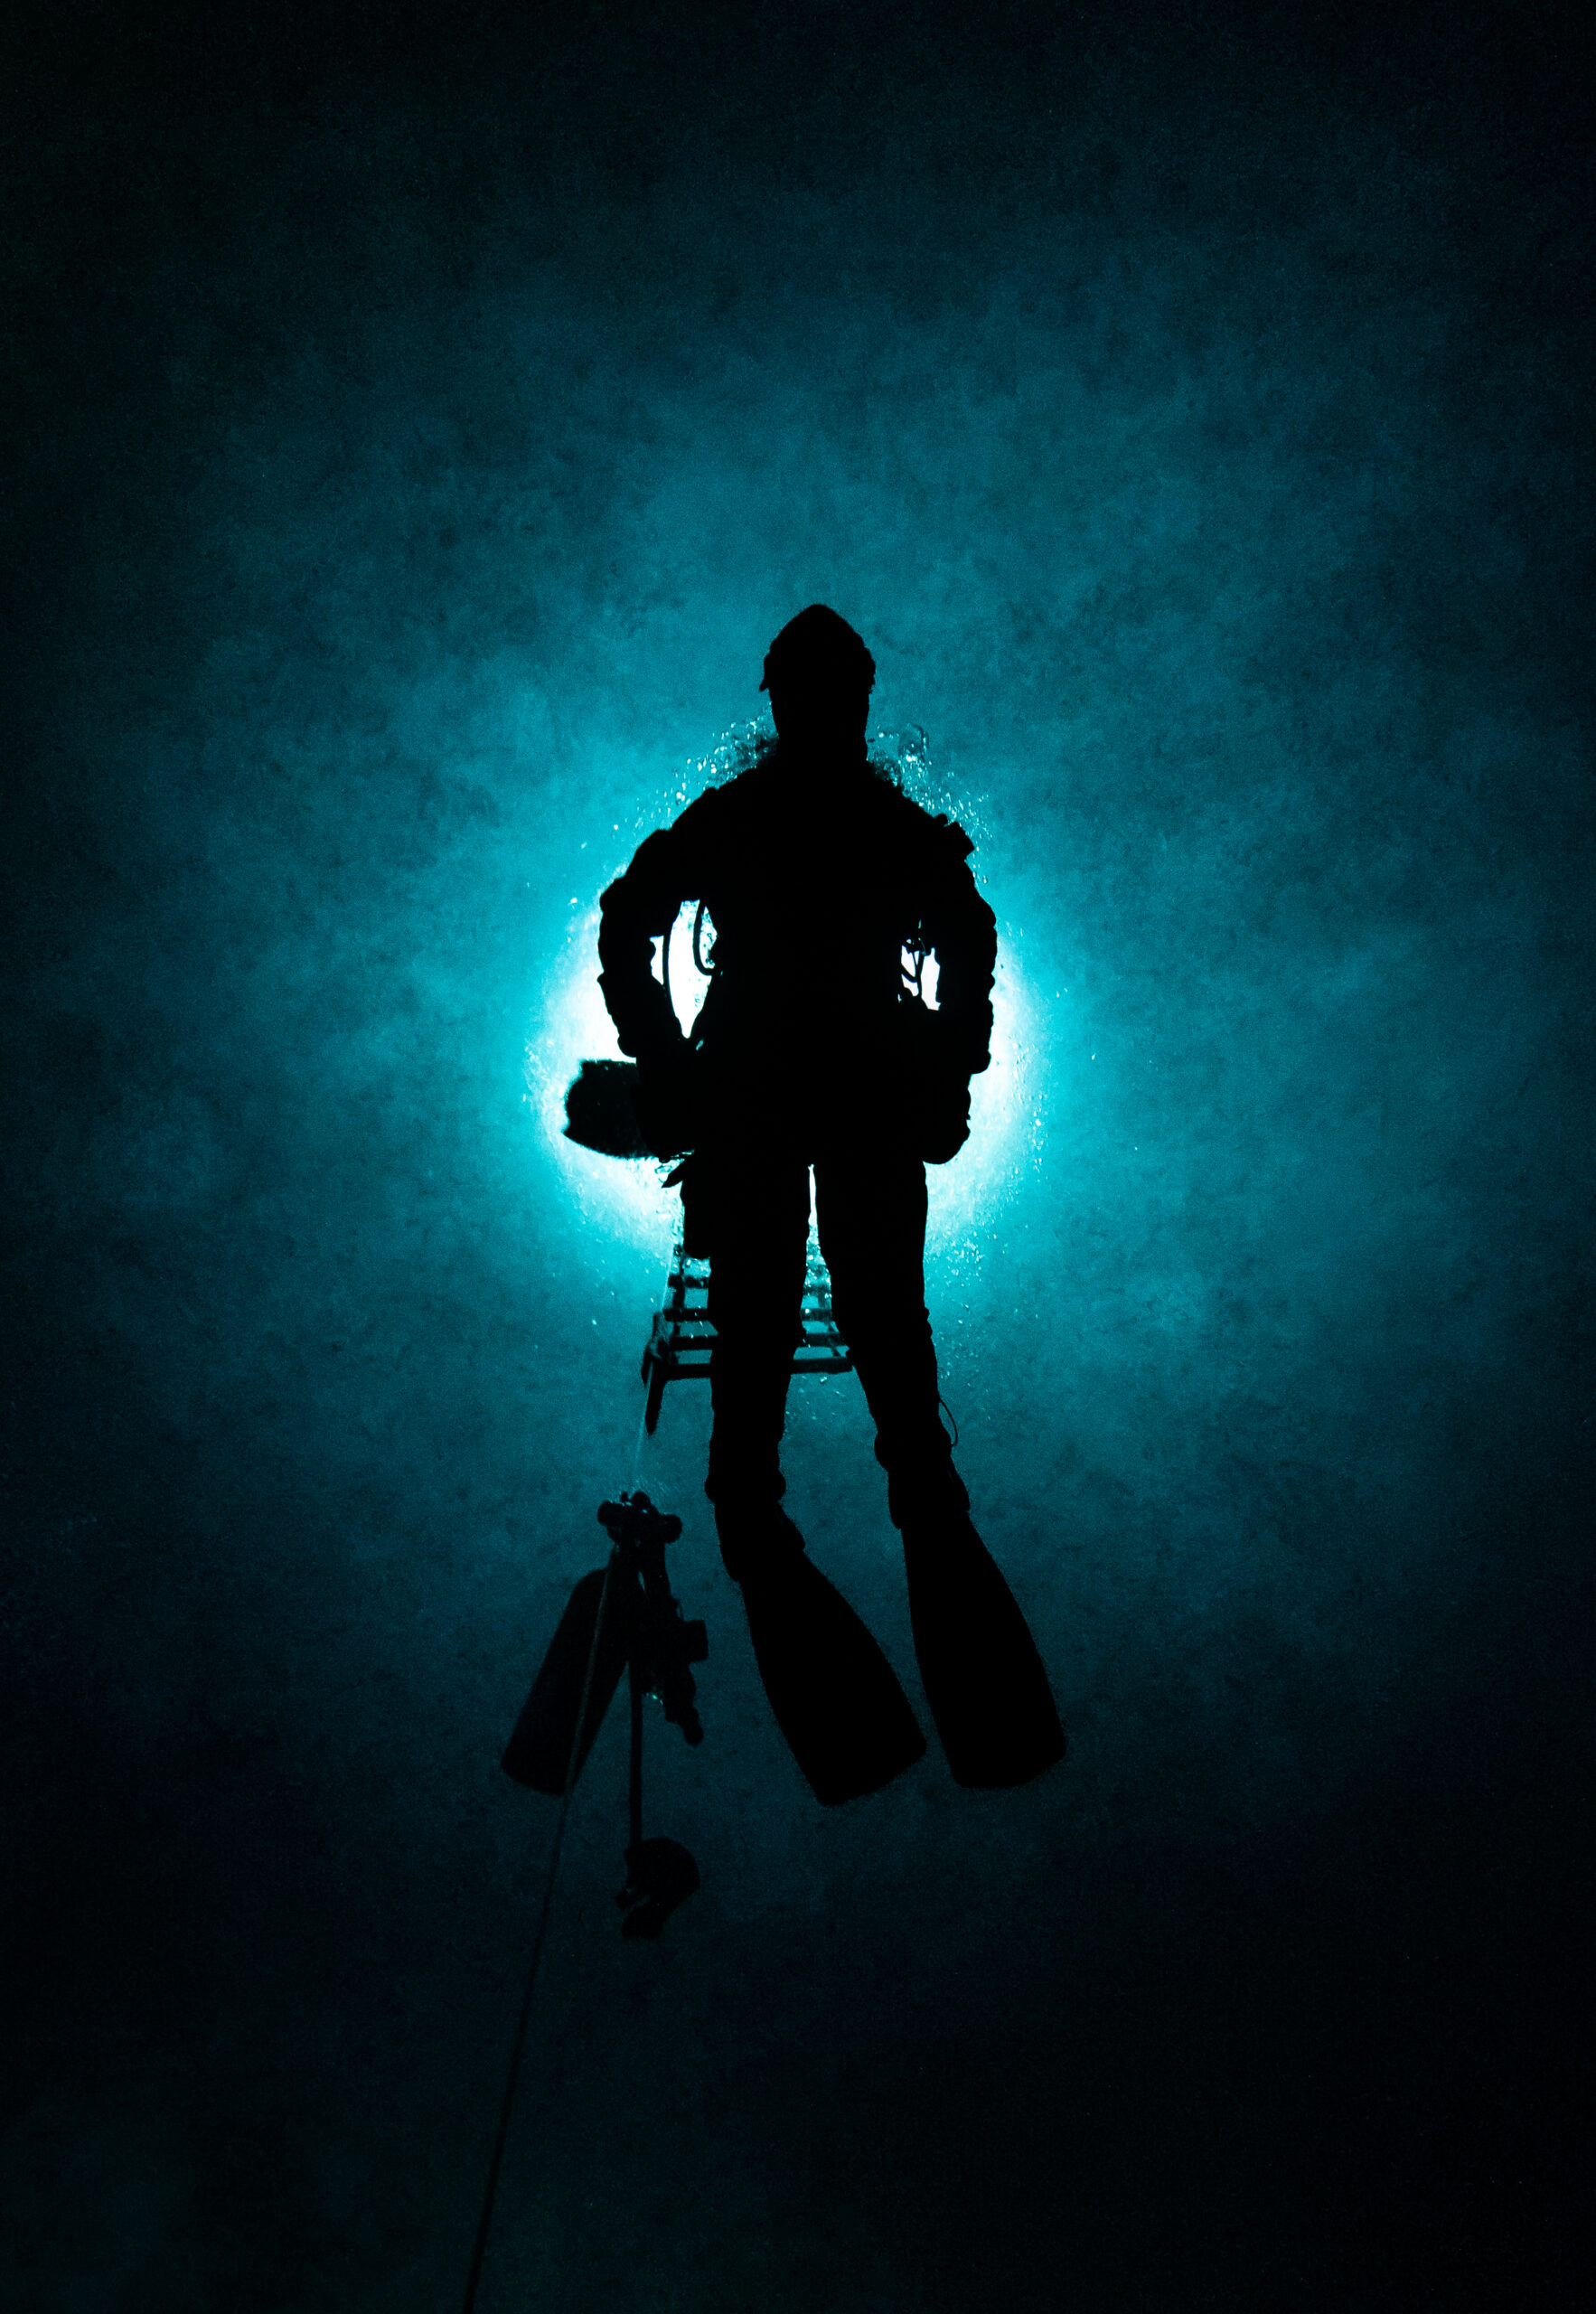
On today’s dive at the Jetty, I played around with silhouette photography. The ice hole and the sea ice cracks offer such bright light in contrast to the dark surrounding depths. Such a dynamic light environment down there! Photo credits: Rowan McLachlan
“The Camera” – Featuring Andrew ThurberAndrew Thurber below a sea ice crackLila Ardor Bellucci below the sea ice holePanorama of the Jetty dive site, McMurdo AntarcticaBrinicles and anchor ice at the Jetty